More than just look good, a great T-shirt design can spark conversations, build recognition and turn everyday moments into opportunities for your brand to stand out. Whether you’re creating T-shirts for your business, an event or a new merch idea, the right design helps you show up consistently and make a lasting impression without saying a word.
In this guide, you’ll learn how to design a T-shirt step by step – from defining your goal and choosing the right design elements to preparing your files for print and finding the best production method. Along the way, you’ll get practical tips to help you create T-shirt designs that both look great and work for your audience, your budget and your business goals.
- Start with a clear goal and audience – your design decisions should always tie back to who the shirt is for and why it exists.
- Keep your design simple and readable, so it works on real garments, not just on a screen.
- Choose the right shirt style, colors and placement early, since they directly affect how your design looks and feels when worn.
- Work with the right production method and prepare print-ready files to avoid costly revisions later.
- Treat your printer or designer as a partner, not a vendor, to get better results and fewer surprises.
How to design a T-shirt in 8 steps
When designing a T-shirt, it might seem ideal to start with creatives first, but it actually works best when you follow a clear process. These eight steps walk you through the full T-shirt design cycle – from defining your goal to getting your design ready for print.
1. Figure out why you need a shirt
No matter your reason for designing a T-shirt, it’ll always involve a little bit of branding. If you’re using T-shirts for promotional purposes, branding is your main goal. Even if it’s strictly fashion, you’ll still need to weave consistent brand themes into all your products. For personal use – like commemorating an event, for example – you want to make sure your T-shirt design communicates clearly.
If you haven’t already, write out a list of the key themes, styles and personality traits you want your brand and shirts to convey:
- Is your brand playful or serious?
- Edgy or conservative?
- Luxurious or affordable?
A clear T-shirt design can answer these questions at a glance.
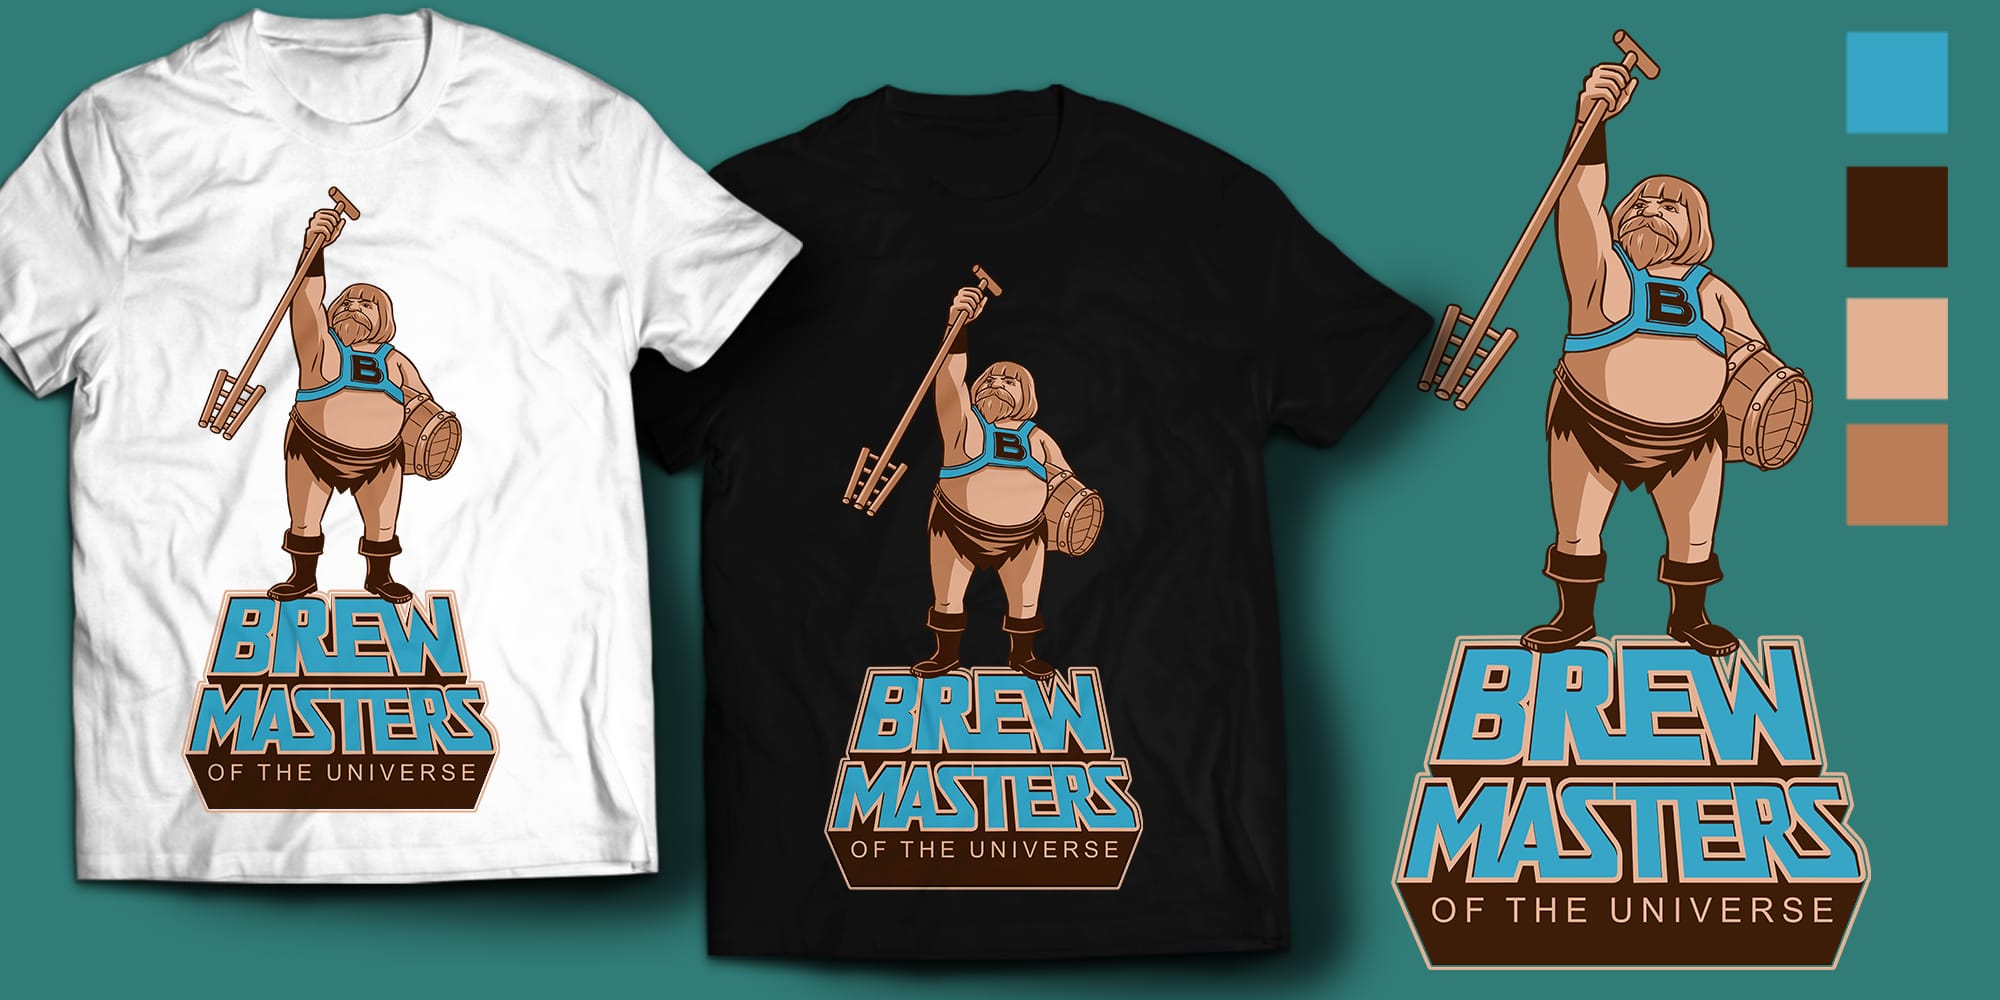
Source: T-shirt design by yuyunarts via 99designs by Vista
Take a quick peek at the example above. What does it tell you about the Brewmasters company? For starters, they don’t take themselves too seriously, and the wooden instruments suggest a more traditional brewing style that hints at a classic taste. A single illustration can communicate a lot about a brand.
To get the most effective design, move away from your personal preference and rely more on real, quantifiable data. Think about your audience first: Who are your target customers? What brand traits do they want to do business with?
Below are four use cases to guide your T-shirt design process by helping you define why you need a shirt and what you want it to do.
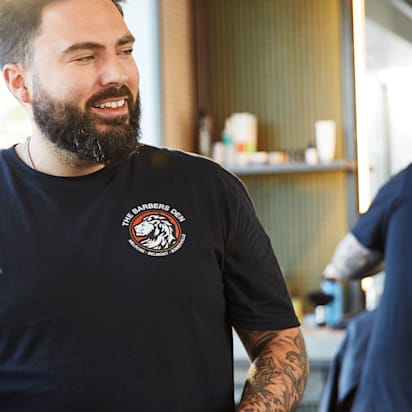
Promotional gifts
T-shirts are often a great giveaway to keep your brand in the minds of prospective clients and customers. This could get the word out at conventions, conferences or other promotional events.

Source: Design by dudeowl via 99designs by Vista

Source: T-shirt design by XZEQUTEWORX™ via 99designs by Vista

Source: T-shirt design by PANG3STU via 99designs by Vista
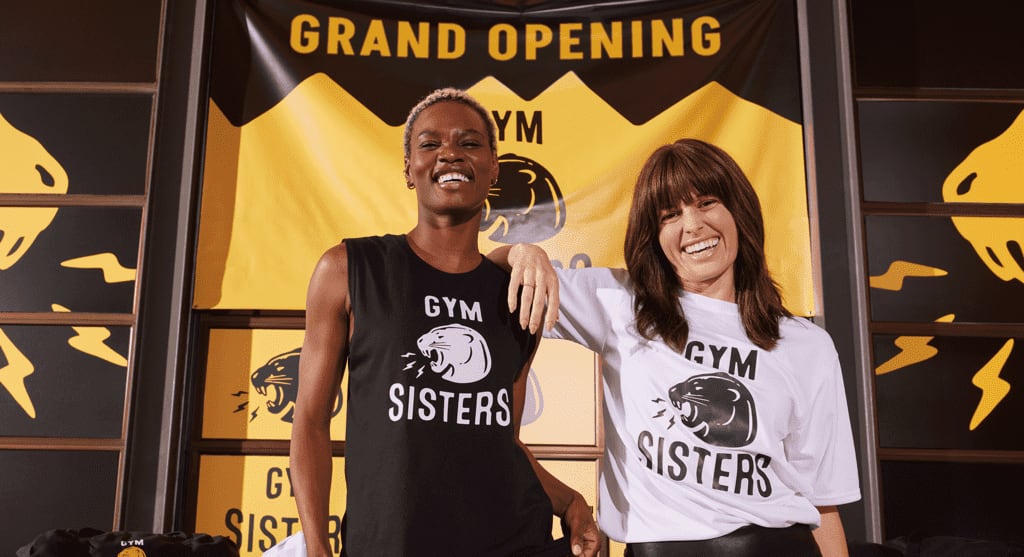
Company and business culture
Employees get shirts for team spirit, appreciation or perhaps even a company uniform. The goals are similar to promotional gifts with a strong focus on brand consistency.


Merchandise
Your T-shirts are a product you plan on selling, so make sure to factor in style, market demand and business strategy. For merchandise, design plays a direct role in whether people choose to buy and wear your shirt.
You’ll need to understand your shirt’s place in the market, so consider researching what your customers actually want. Your personal tastes are a good starting point, but when you’re designing for a wider audience, real feedback is more reliable than guesswork.


Event swag
Special events need memorable takeaways, and T-shirts are a natural fit. These designs often focus on shared experience and identity, similar to internal company shirts but for a broader audience.


Regardless of their use, most T-shirts are promotional in some way. Even if you’re designing T-shirts as merchandise, include your brand logo so people know who made the shirt and where to find more. In many cases, your logo should be clearly visible without overwhelming the design.
Apply the same level of thought you would to any marketing asset. A well-designed T-shirt works like a moving advertisement – it keeps your brand visible wherever it’s worn.
Once you’ve determined your goals, you can prioritize the different aspects of your T-shirt design. For example, fashion might be a high priority for merchandise tees but not for employee gifts. You want to tailor your design in a way that best suits your needs.
2. Define your budget and quantity
You’re ready to jump into your T-shirt design. We get it. But let’s lock in a couple of key details first, so you can focus your design better: your budget and quantity. How much you can spend and how many T-shirts you need will shape your design decisions from the start.
For example, budget and quantity will help determine how many colors you can use. Printing costs often increase with each additional color, so if you’re working within a set budget, keeping your palette focused can make a real difference. The cost will also vary based on the T-shirt printing methods you use.
The number of shirts you need will also influence your printing method. Some methods are ideal for printing in bulk, while others have a higher cost per shirt and are better for small orders.
Before you begin to think about designing or printing, take a moment to map out your budget and quantity. It’ll make every next step smoother and more intentional.
3. Decide on your T-shirt printing method
There are many things to consider when choosing the best T-shirt printing method. Cost, appearance, production time and materials are all important. The more you know about each method, the easier it will be to decide which one is best for you – and how to get the result you’re aiming for.
Screen printing
This is the gold standard for T-shirt printing. The printer makes original screens of your design (one for each color) so you can print in bulk.


Pros: Reliable and widely used printing method with consistent, high-quality results. Cost-effective for large orders over 20 units.
Cons: Requires a new screen for each color or design revision, increasing setup costs. Becomes more expensive as the number of colors increases.
Vinyl graphics
Another method of heated transfer is vinyl printing, which uses more durable vinyl instead of just ink.


Pros: Durable printing method with a bold, raised finish that stands out on fabric. Works well for simple designs and smaller runs.
Cons: Costs increase with each additional color, making complex designs more expensive. Less efficient for large-volume orders.
Direct-to-garment (or print-on-demand)
A newer option, direct-to-garment (DTG) printing, uses inkjet printing that prints directly on fabric.


Pros: Supports highly detailed, full-color designs with minimal setup. Ideal for small batches or one-off prints.
Cons: Becomes less cost-effective as order size increases. Results can vary depending on fabric and may be less effective on dark garments.
Specialty T-shirt inks and finishes
Like any other printing medium, T-shirts have their own set of unique ink options. These can change not just how your design looks, but how it feels when worn.
- Plastisol: The standard ink used in screen printing. Durable and vibrant.
- Foil: Shiny and reflective, great for eye-catching designs.
- Novelty: Glitter, hologram or even a fuzzy texture for added personality.
- High-density: Creates a raised, dimensional effect that stands out.
- Gel: Similar to high-density, but with a smoother, slightly glossy finish.
- Water-based: Soaks into the fabric for a soft, barely-there feel.
For merchandise: Specialty finishes can help your design feel more premium and increase perceived value.
For promotional use: Stick to simpler finishes to keep costs predictable at scale.
To better understand the ins and outs of the printing process, check out our guide to T-shirt printing.
4. Brainstorm your design concept and choose your T-shirt design elements
Here comes the fun part. Now you get to figure out what’s actually going on with your T-shirt. It’s tempting to start here, but your earlier decisions – goals, audience and budget – are what make this step easier and more focused.
Your design could go in a million different directions. As you’re brainstorming, here are some ways to keep your ideas grounded and effective.
T-shirt types
Before you sketch anything, think about the kind of T-shirt you’re designing. The format shapes the design just as much as the artwork itself.
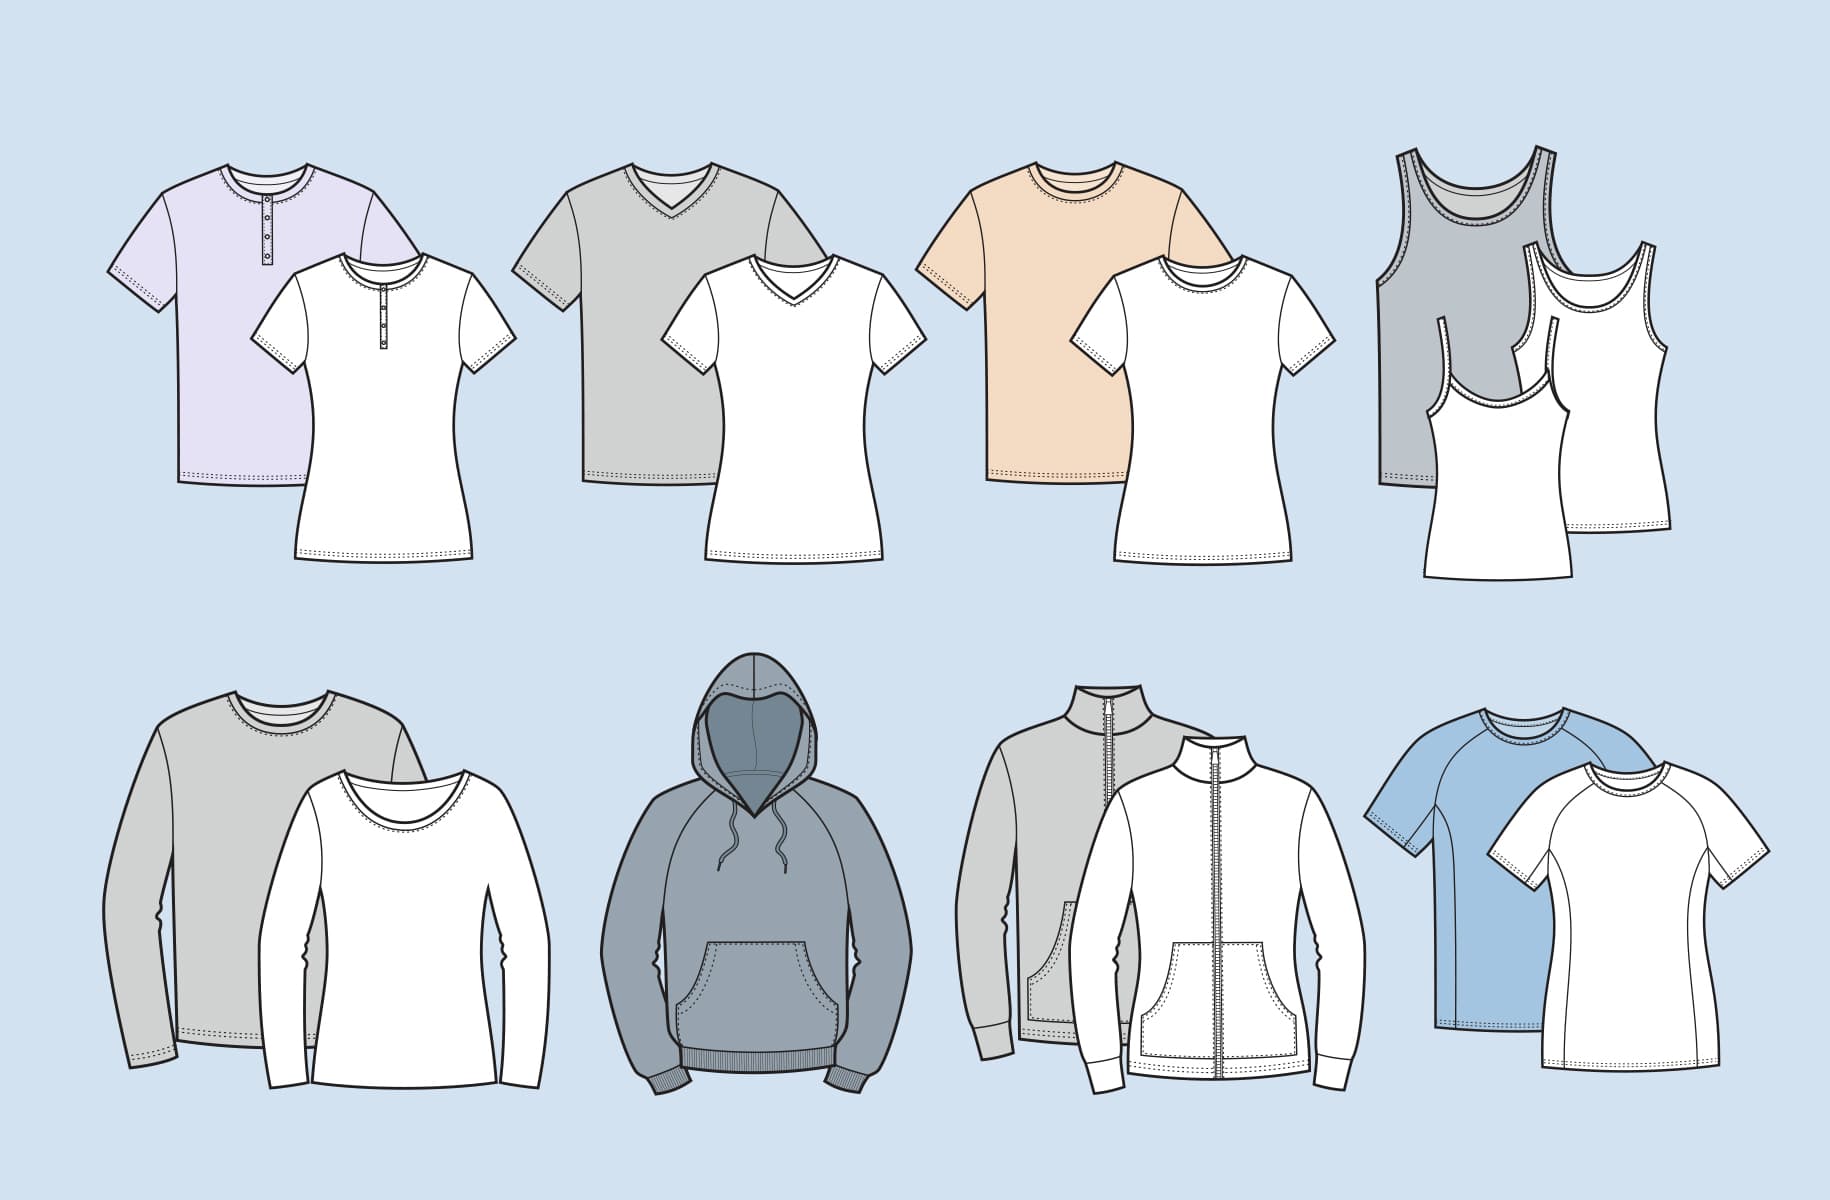
Think about your audience and intended goals before deciding on the right type of T-shirt. A revealing crop top isn’t the best promotion for a law firm, for example.
For team uniforms, stick to classic, comfortable fits like standard crew necks that work well across different body types.
As you start sketching out T-shirt design ideas, make sure they will translate to the actual size. When designing your T-shirt, use an 18” x 18” canvas and physically place your designs on a shirt. That doesn’t mean you have to fill the whole space, but a realistically sized canvas will help you get the right proportions for your T-shirt.
Once you have your design, consider how it will look on larger and smaller shirt sizes. If you choose a screen printing process, different sizes may require different screens, which means additional costs.
Style and imagery
At this stage, you have to rely on your creative and artistic instincts to communicate the messages you want to say. Don’t forget these questions we talked about before:
- What is your brand?
- Who is your market?
- Why are you designing a shirt in the first place?
For merchandise, aim for designs that feel intentional and easy to recognize – strong concepts tend to perform better across different products and collections.
Put all of that together, and you’re ready to start designing a T-shirt that’s perfect for your needs.
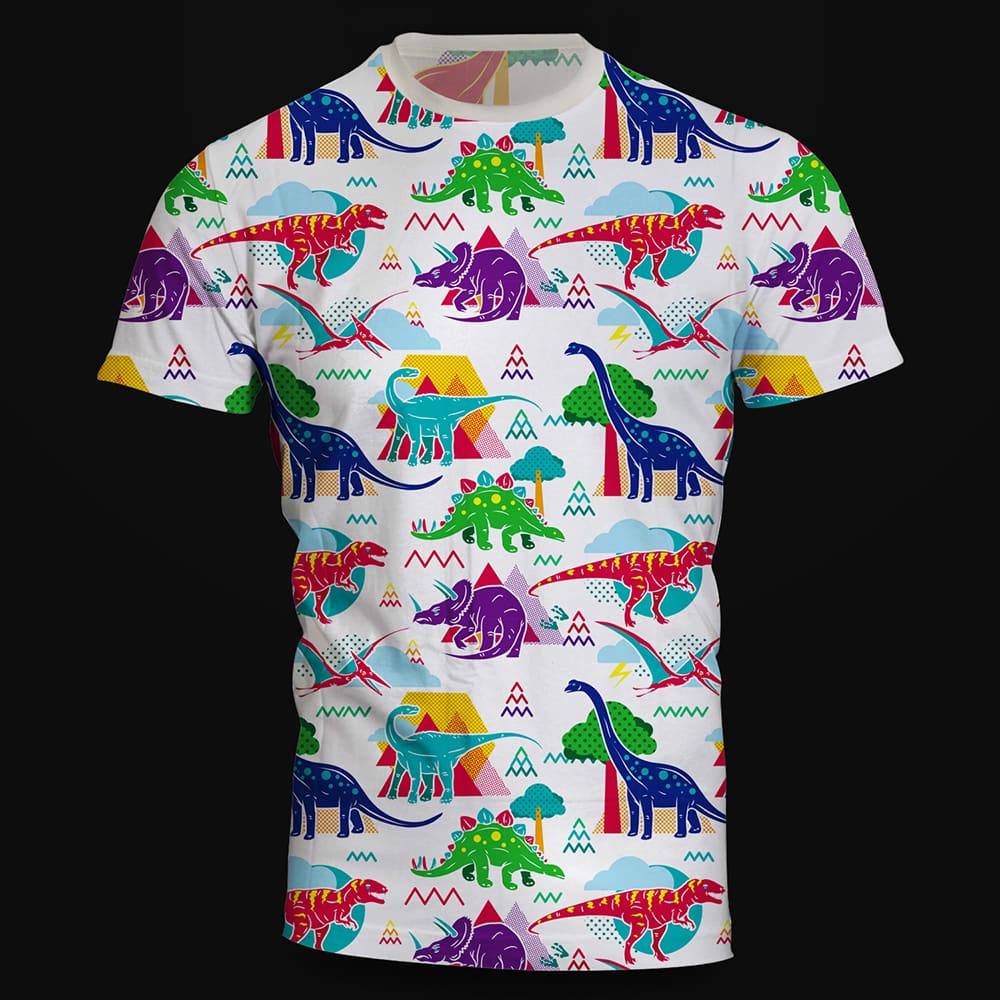
Source: T-shirt design by Prim via 99designs by Vista
For example, take a look at the dinosaur T-shirt design above. This is a kids’ merchandise brand, so the style is cute and cartoony, appealing to its market.
Compare that to “The Forgotten Path” T-shirt design below. This German hardcore music festival is definitely not marketed to kids. That opens up the designs to be more intense and expressive, which suits the audience.
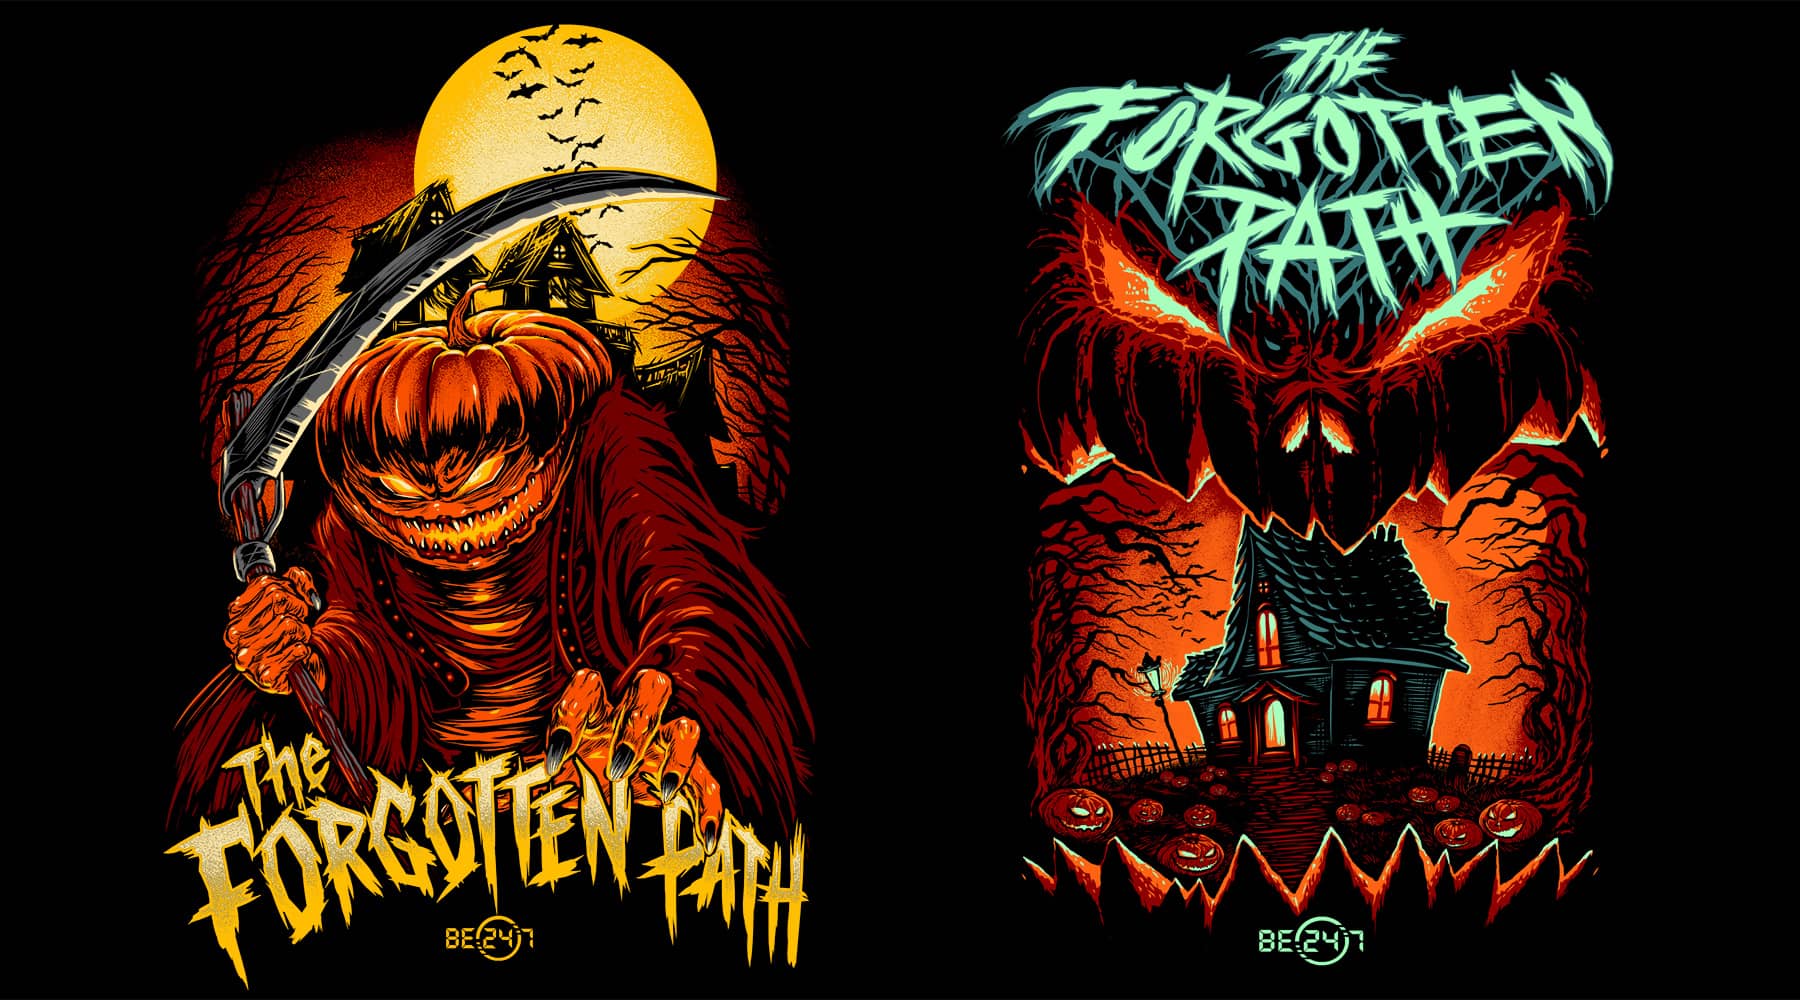
Source: T-shirt design by DiditRed via 99designs by Vista
There are also designs that work in between. A clean, professional design can still feel interesting with thoughtful layout, color or subtle graphic elements.
The design below shows us how to design a professional, risk-free T-shirt without being boring. The brand’s logo is front and center, but the look and feel are spiced up, so it seems more fashionable than a standard business T-shirt design.

Also, remember that your design sits on a moving surface. Fabric stretches, folds and shifts throughout the day. Designs that are clean and well-balanced tend to hold up better across different body types.
For similar reasons, you should also avoid detailed imagery, such as subtle color gradients or very fine lines. They can get lost during printing or wear. Simple, intentional design choices usually perform better.
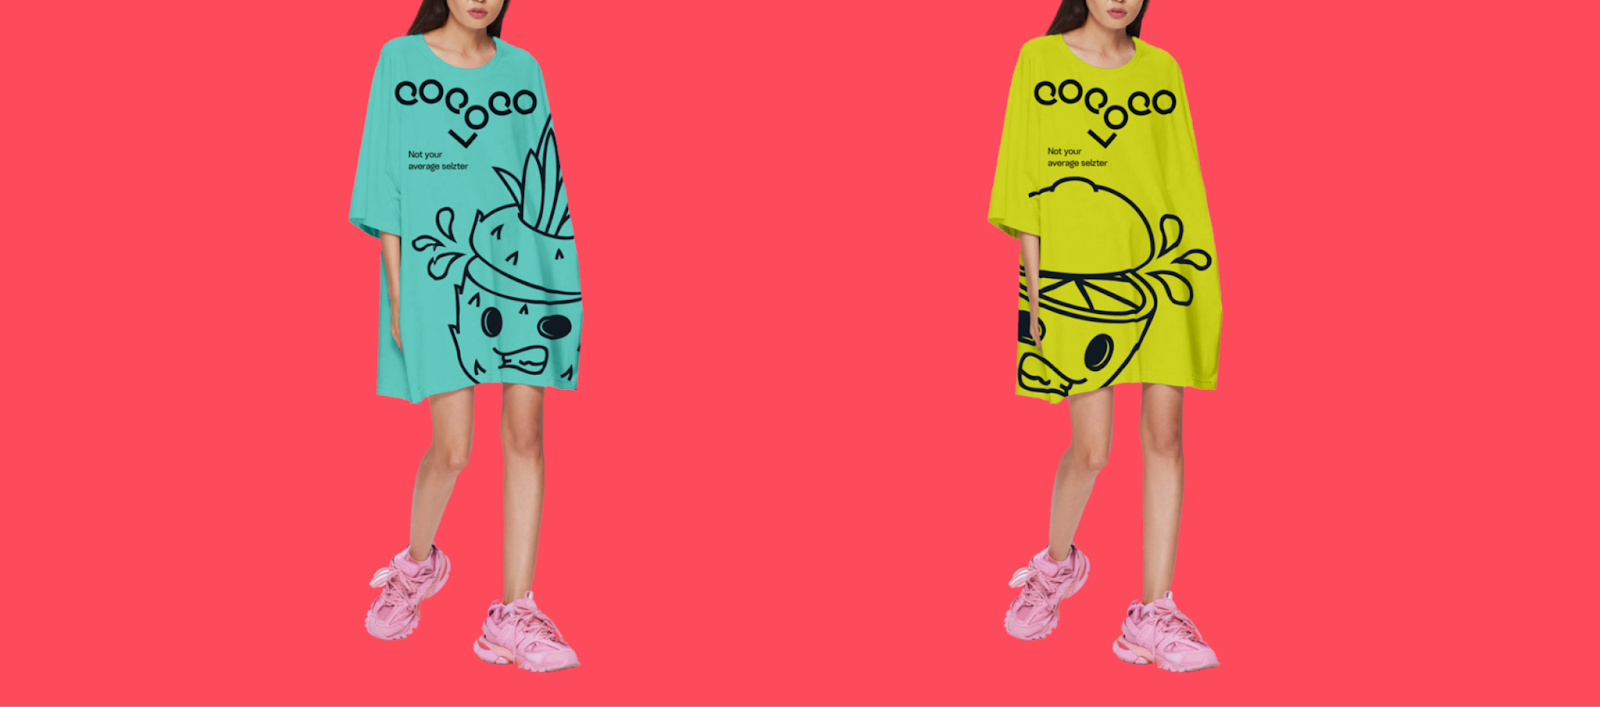
Source: Branded T-shirt design by goopanic via 99designs by Vista
T-shirt typography
The fonts you choose say a lot about your brand. Serif fonts (script fonts) look more classic. Sans-serif fonts make a design more modern. T-shirts also give you room to experiment with bold display fonts, but readability still matters.
If your design relies on text, make sure it’s easy to read quickly. Most people will only glance at it, so clarity matters more than complexity.
Check out our list of the best fonts for T-shirts to find the right typographic combination for your T-shirt design!
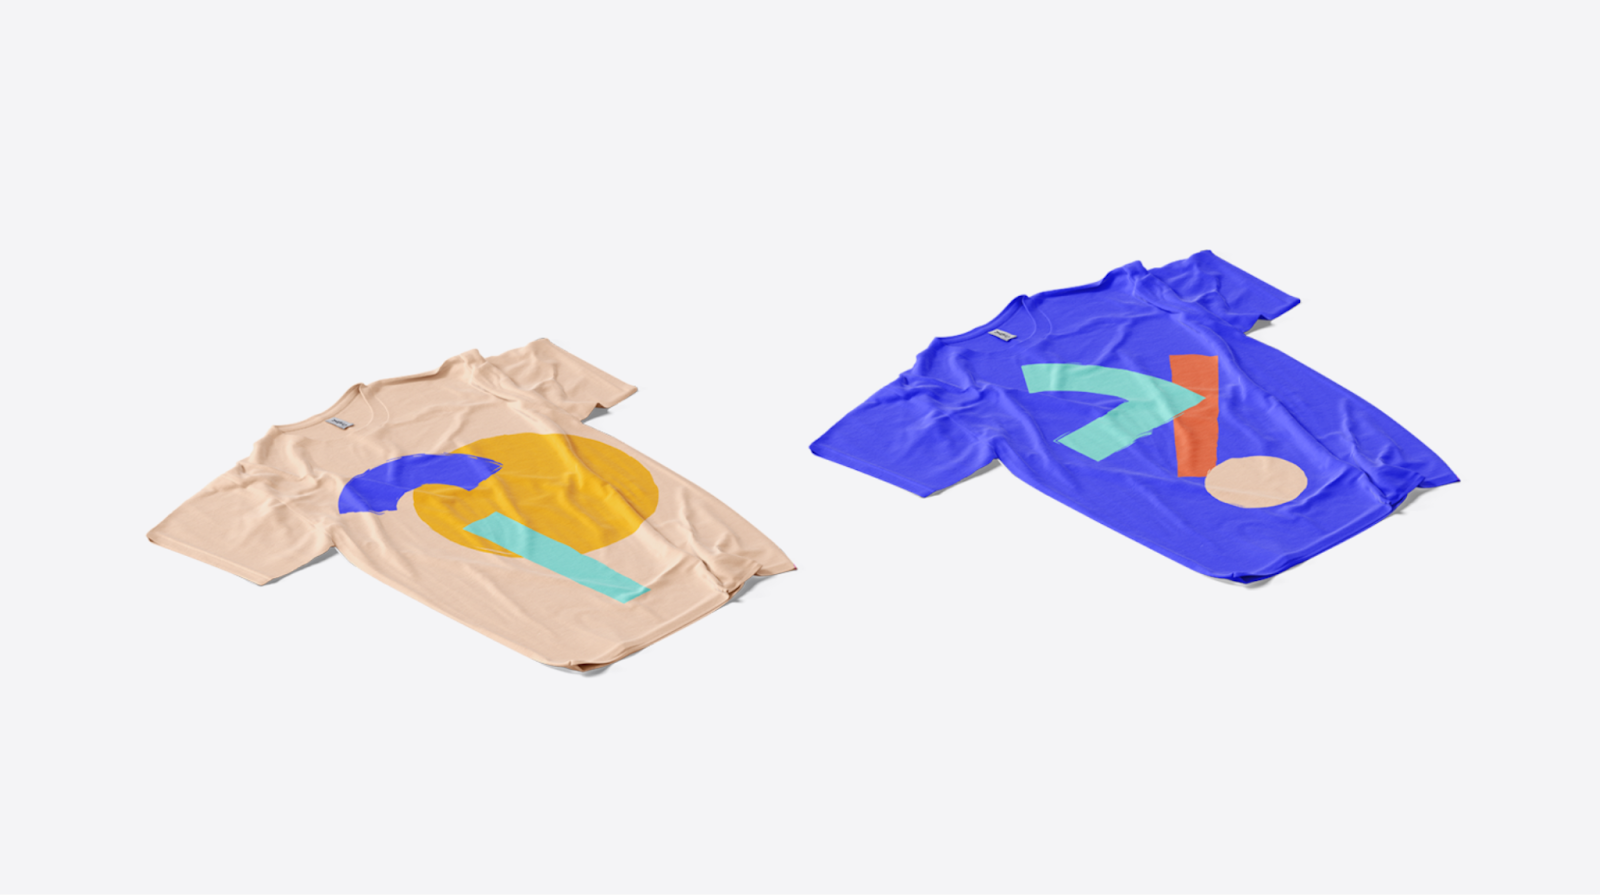
Color in T-shirt design
The element of design that instantly communicates personality best is color. Each shade, hue and tint evokes an emotion, acting as a shortcut for you to portray something about your brand at just a glance.
T-shirt designs involve two sets of colors: the fabric color(s) and the print color(s). To make them work together, design with the fabric as your background. This helps you plan contrast and balance early on.
A colored canvas can have an impact on what inks look like, so make sure you talk to your printer ink rendering on colored fabrics.
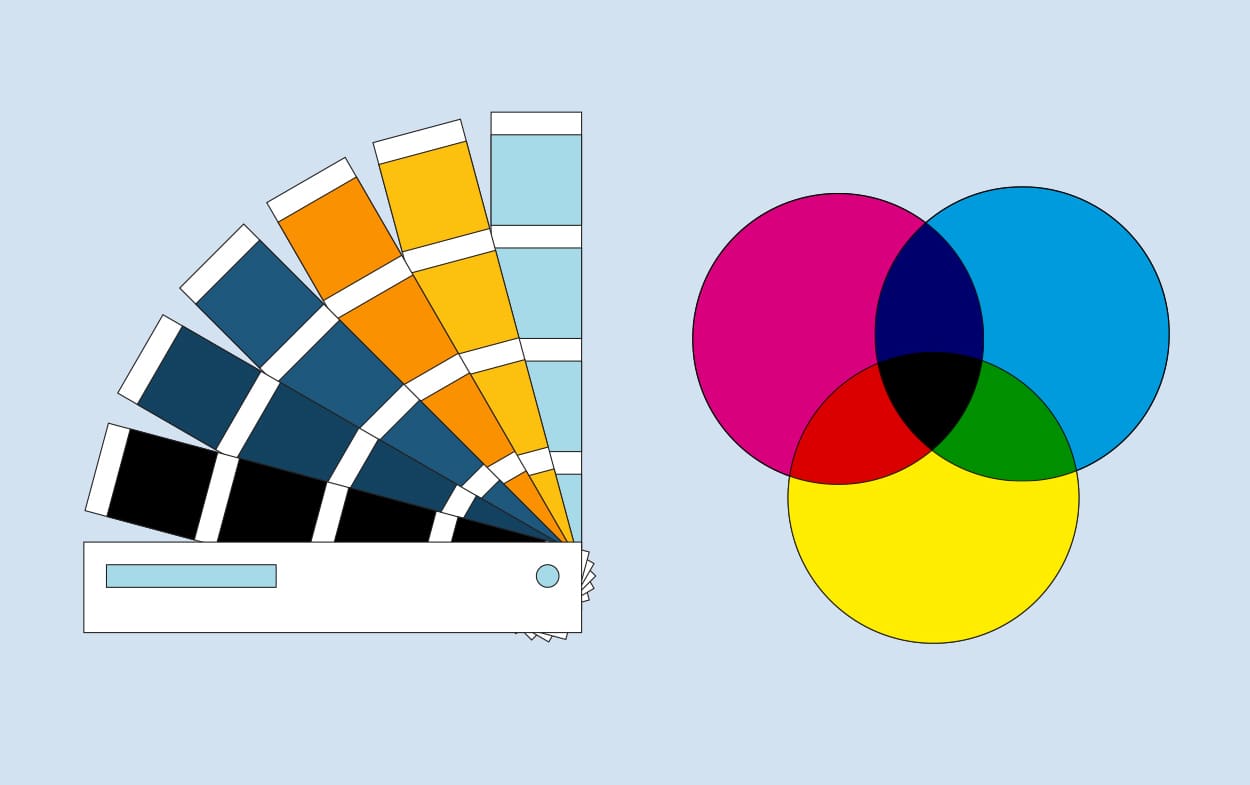
Because of how T-shirt inks work, color matching isn’t always exact. The most cost-effective option is usually approximation, which means your version of a color may differ slightly from the final result.
Exact matches are possible with Pantone color or custom CMYK blends, but they come at a higher cost. Pantone uses predefined ink tones, while CMYK combines Cyan, Magenta, Yellow and black to create color.
If brand consistency matters, it’s worth confirming your color approach with your printer early on.
T-shirt design placement
Where you place your design matters just as much as the design itself. Placement affects visibility, balance and how the shirt feels when worn.


Here are a few common options to consider:
- Center chest: Clean, balanced and works for most designs
- Left chest: Subtle and logo-friendly, often used for uniforms or branded apparel
- Full front: Bold and attention-grabbing, ideal for merchandise
- Back print: Useful for events, teams or designs that tell a story
- Sleeve detail: Small accents that add personality without overwhelming the shirt
For promotional use, it’s best to keep placements simple and easy to recognize at a glance. For merchandise, consider playing with scale and placement to create something more distinctive.
Check out our full guide to T-shirt design placement for sizing tips, visual examples and best practices.
5. Find a designer
Got design skills? Jump right in.
If you don’t, don’t worry. There are plenty of pros out there ready to turn your idea into a polished T-shirt design.
The DIY route
The main advantage of designing a T-shirt yourself is the price. If your budget is tight, the decision has already been made for you. Design freedom is also a big advantage, and there are accessible design tools like VistaCreate, that make it easier than ever. But don’t forget that professionals understand the technical side of T-shirt design – from print methods to file setup – along with branding and composition.
Hiring a pro
Rather than teaching yourself marketing, branding and graphic design, why not work with someone who already has that expertise?

Source: Branded T-shirt designs by goopanic via 99designs by Vista
Collaborating with a freelancer can take some coordination, but it’s also where strong ideas come to life. Look for a designer whose style aligns with your vision and who understands your goals. Consider their portfolio, experience and approach to projects. With VistaPrint’s design services, you can hire a professional designer or work with multiple designers by starting a design contest.
For merchandise, choose a designer with experience in retail or apparel – they’ll know how to create designs that look good and sell well.

Source: T-shirt design by goopanic via 99designs by Vista
Once you’ve found your designer, clear communication is key. Share your design ideas, message and intended audience. Include details about colors, logos, visual style, T-shirt type and printing specs. Reference designs you like to give helpful direction. The more context you provide, the smoother the process will be and the closer the final design will match your expectations.
Find more tips on how to work with a designer in our guide to ensure a collaborative and successful creative process.
6. Evaluate your design
As you evaluate your design, think about how it aligns with your goals. And don’t forget your marketing and technical requirements. Will your design fit on a tank top? Is the amount of color within your budget? Is the messaging right? Communicate your feedback clearly to your designer to make sure your next version looks even better.
Then, make sure to run it by your team or a few people who are further from the project and can give you honest feedback. Even if it’s just your neighbor across the street, people not closely associated with your T-shirt design will notice things you never did.
Consider asking them:
- What is the one key message you get when you look at this shirt?
- Who is this shirt for?
Their answers to these questions will help you determine if the T-shirt is communicating what you want it to. If not, go back to the drawing board and figure out what you can change.
7. Get the right files from your designer
You’ve got the perfect T-shirt design! Now it’s time to revisit the requirements from your printer and confirm you have everything ready for production.
You likely need the following:
- Your T-shirt design in a vector format: This will likely be an Adobe Illustrator (AI), PDF or EPS file, which ensures your design stays sharp at any size. You’ll need one for each different T-shirt design you create.
- Color codes: If your printer offers custom colors, make sure you have the correct Pantone or CMYK color values so your printed result matches your design as closely as possible.
Prepare your design files for print
Before you send your files off, double-check these key details:
- File types: Vector files (AI, EPS, PDF) are ideal for most printing methods. For raster files, use high-resolution PNGs with a transparent background when needed.
- Resolution: Make sure raster images are at least 300 DPI at final print size to avoid blurry or pixelated results.
- Color mode: Printers typically use CMYK, not RGB, so colors may appear slightly different when printed. Check with your printer for their preferred setup.
- Transparency: Use transparent backgrounds for designs that shouldn’t include a visible box or background color.
- Print area sizing: Set your artwork to the actual print size (e.g., 10” x 12”) to ensure proper placement and proportions.
8. Find a reliable printer
Once your design’s ready, it’s printing time. The right printer will help you get the result you expect – on budget and on schedule. Look for one that offers the method you need at a price you can afford. Additional services, support and clear pricing can make a big difference, too.

Before you commit, run through these checks to make sure your printer is the right fit for your project:
- Check for in-house expertise: Find out if the printer has an in-house art department. This often means they can review your files, catch issues early and guide you before printing starts.
- Ask for real samples: Request finished shirts, not just digital mockups. Seeing and feeling the final product is the best way to judge print quality, fabric and durability.
- Visit if you can: Many printers welcome visitors. A quick visit can give you confidence in their process and quality standards.
- Think long-term: Build a relationship with a printer you can grow with. If they can handle more complex jobs (like six or more colors), you won’t need to switch later.
- Request pre-press proofs: For larger orders, make sure your printer provides a sample or proof. This is your chance to confirm placement, sizing and colors before full production.
- Watch for hidden costs: Ask upfront about charges for screens, setup, films or Pantone matching. A clear quote now helps you avoid surprises later.
Planning to turn your T-shirt designs into a business? Choosing a printer that can scale with you – from small test runs to larger production – is key. Learn how to start a clothing line.
Design and print your T-shirts with VistaPrint
If you want a more streamlined approach, VistaPrint lets you design and print in one place. You can upload your own artwork or create something from scratch using easy-to-use tools, then choose your shirt style, fit and print method – all in the same workflow.
It’s a practical option if you want fewer handoffs and more control over the final result, especially for business, events or team apparel.
Current T-shirt design trends
Source: T-shirt design by goopanic via 99designs by Vista
Once you’ve nailed the fundamentals, trends can help you shape a design that feels current and relevant. You don’t need to follow them all – but knowing what’s working right now can spark ideas and help your T-shirt connect with the right audience.
- Minimal logo systems: Clean, scaled-down logos placed on the chest, sleeve or hem. Often paired with subtle branding details. Works well for team uniforms, startups and professional merchandise.
- Vintage and retro revival: Faded palettes, distressed textures and throwback typography inspired by past decades. Great for merchandise, lifestyle brands and event apparel with a nostalgic angle.
- Bold typography statements: Oversized text, strong slogans and expressive fonts that carry the design on their own. Effective for promotions, campaigns and statement-driven merchandise.
- AI-assisted graphics: Complex visuals, surreal compositions and highly detailed artwork created or enhanced with AI tools. Ideal for brands that want to stand out or experiment with more intricate designs.
- Sustainable, eco messaging: Nature-inspired visuals, earthy tones and messaging around sustainability or responsible production. A strong fit for eco-conscious brands, events and community initiatives.
- Back-print dominance: Small front logo paired with a large, detailed graphic on the back.
Popular for merchandise, events and brands looking to create a more premium feel. - Full-coverage and all-over prints: Designs that extend across the entire garment, creating a bold, immersive look. Best for fashion-forward merchandise and limited-edition drops.
Time to design an amazing T-shirt
T-shirt design has never been more accessible – but getting it right still takes a bit of know-how. In this guide, you’ve learned how to plan your budget, choose the right printing method, shape a strong design concept and prepare your files for production. You’ve also seen how placement, materials and current design trends can influence the final result.
Now it’s your turn. Take what you’ve gathered here and start designing. Whether you’re creating shirts for your business, an event or your own brand, a thoughtful approach will always show in the finished product.
FAQs about T-shirt designs
What makes a good T-shirt design?
A good design communicates one clear idea without needing explanation. It feels intentional, balanced and easy to recognize at a distance. Strong designs also age well – they don’t rely on trends that fade quickly and still look relevant after repeated wear.
How do I choose the right placement for my T-shirt design?
Match placement to how the shirt will be used. Promotional or branded shirts benefit from visible areas like the chest or upper back. Lifestyle or retail designs often feel more natural with off-center or oversized placements. Always account for movement: designs shift when worn, so avoid placing key elements near seams or folds.
What file format and resolution are best for printing a T-shirt design?
Use vector files (AI, EPS or PDF) whenever possible for sharp, scalable results. If you’re working with images, set them to 300 DPI at the exact print size. Also, make sure colors are prepared in the correct mode (typically CMYK or Pantone) to avoid unexpected shifts during printing.
How can I create a T-shirt design if I don’t have design experience?
Focus on structure before style. Start with a simple layout (text, graphic or a combination) and build from there. Use ready-made templates or hire a designer for refinement rather than trying to master everything at once. Clear direction matters more than technical skill.
What are the most common mistakes to avoid in T-shirt design?
Frequent T-shirt design mistakes include:
- Designing only for a flat screen instead of a real garment: It often leads to poor results. Proportions can feel off. Plus, details get lost and colors behave differently on fabric.
- Skipping test prints: What looks right digitally can change once it’s produced.