Custom T-shirt printing can help small businesses create apparel that feels professional, recognizable and ready for real everyday use.
Whether you’re creating staff shirts, event merch or customer giveaways, custom apparel printing works best when the fabric, decoration method and design file all support the same goal. For T-shirt printing for branding, those choices can shape how polished the final shirt looks, how comfortable it feels and how long people keep wearing it.
But starting a custom clothing project can feel overwhelming. With so many choices, it is easy to get lost in the technical details. The challenge is knowing which choices matter most.
Print method, fabric, file format, color setup and artwork size can all affect the finished result. A logo that looks sharp on screen still needs to work on cotton, blends, different shirt sizes and repeated wears.
This guide walks through the key decisions behind a custom T-shirt order, from printing and embroidery to fabric choice, transparent backgrounds, color setup and sizing.
Whether you’re outfitting a team, preparing for an event or testing merch for your business, the same principle applies: the best custom T-shirts are designed for the people who will actually wear them.
Let’s set your brand up for success.

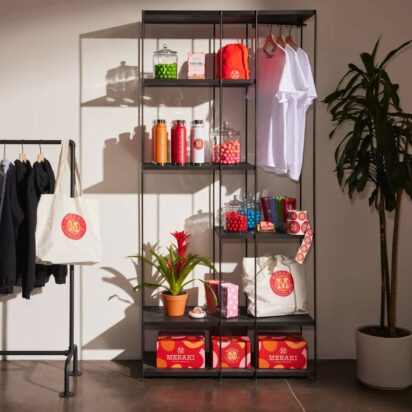
Custom T-shirts can help your brand feel consistent across staff apparel and other customer touchpoints. Source: VistaPrint image database
- Choose your ideal customization method based on artwork detail, fabric choice, order size and how you want the finished shirt to feel.
- Use transparent background graphics from design files to safeguard garments from the “sticker effect.”
- Plan artwork size across different garment sizes so your logo doesn’t feel too large on a small shirt or too small on a larger one.
- Check file format, resolution and color setup before ordering, because screen colors and printed fabric colors do not always match exactly.
Behind the scenes: How custom T-shirt printing works
Ever wonder how to print custom T-shirts that look and feel like they came off a retail shelf?
Turning a digital design into a physical, wearable piece of clothing takes a few careful steps, from file checks to print setup, production and packing. Here’s a simple version of how the process usually works.
Phase one: File check and pre-press setup
The journey begins with your artwork file. Before production, the file may be checked for things like resolution, alignment, background transparency and whether the design will print clearly at the chosen size.
If you’ve ever wondered, “What file resolution and format do I need for a professional T-shirt print?” the answer is clear.
For a professional-looking T-shirt print, use a vector file where possible, such as PDF or SVG, or a high-resolution raster file, such as a transparent PNG. As a general rule, artwork should be prepared at the final print size and high enough resolution to stay sharp. This helps avoid fuzzy logos, unreadable small text or unwanted background boxes.
Phase two: Print method setup
Next, the print method determines how the order is set up. For traditional screen printing, each color usually needs its own screen or stencil. For digital printing methods, the artwork is prepared for the printer so the design, colors and placement line up as intended.
The main point for business owners is that different methods have different setup needs, which can affect cost, speed, texture and which designs work best.
Phase three: Production and flash curing
Once calibration is complete, the actual printing begins. Garments are loaded onto automated platens where ink is precisely applied. Some printing methods use heat during production to set or cure the ink so the design bonds properly with the fabric, which is known as precision heating.
This step prevents colors from bleeding into one another and locks the pigment into the fabric fibers, reducing issues like smudging or poor wash performance. Temperature and timing are important because under-curing or over-curing can affect how the print looks, feels and wears over time.
Phase four: Quality check, packing and dispatch
After printing, finished apparel is checked before it’s packed and sent out. The team may check details like print placement, visible defects, color consistency and overall finish. For customers, this is why file setup, artwork size and method choice all matter before production begins.
The goal is a finished order that looks professional, feels wearable and matches what you approved as closely as possible. Once the order is ready, it can be folded, packed and sent on its way.
“Taking a design from a glowing computer screen to a physical, wearable piece of branding is an exact science. Pre-press file optimization saves small business owners from production delays every single day.”— Pre-Press Team Lead at VistaPrint

A strong custom apparel setup should feel connected to the rest of your brand, from staff shirts to packaging and in-store materials. Source: VistaPrint image database
T-shirt printing methods compared: How to choose your technique
The best method for custom T-shirt printing depends on your artwork, fabric, order size and budget. Some methods are better for detailed color, while others are better for larger orders, textured finishes or workwear. The easiest way to compare your options is to think about what matters most: detail, durability, texture, cost or flexibility.
So, which is better for your design: screen printing, DTG, DTF or embroidery? Here’s a simple way to compare the most common options.
Direct-to-garment (DTG) printing: Best for detailed color
Think of DTG printing like an inkjet printer for clothes. It prints ink directly onto the fabric, which works well for intricate details, photos and soft gradients. It’s a good fit for smaller orders or designs with lots of color, especially on cotton-rich fabrics.
Because DTG does not usually need the same screen setup as screen printing, it can be useful for lower quantities.
Traditional screen printing: Best for bold designs and larger orders
Screen printing is a strong choice for larger orders with simple, bold designs. Ink is pushed through a screen or stencil onto the shirt, creating a clear, slightly raised print. Because each color may need its own screen, this method works best when the design has a limited color palette and the order size is high enough to justify the setup.
It works well for staff shirts, event merch, team apparel and simple logo designs ordered in higher quantities. It’s also a good option when you want strong color on darker shirts, depending on the artwork and ink setup.
Direct-to-film (DTF) transfer: Flexible color across different fabrics
DTF printing prints your design onto transfer film first, which is then heat-pressed onto the garment.
This method is useful when you want bold color on a wider range of fabrics, including tricky polyesters and dark garments. It’s an excellent middle ground, offering the high detail of DTG with the fabric flexibility of traditional transfers. Because the design is transferred rather than printed directly onto the fabric, the finish can feel different from DTG or screen printing.

The right print method helps your design transfer cleanly from digital artwork to a finished custom T-shirt. Source: via depositphotos
Custom embroidery: Best for a textured, premium finish
If you want to elevate your brand presence, embroidery is the way to go. Instead of printing ink, embroidery uses high-speed machines to stitch your design directly into the fabric. It’s perfect for heavy-duty workwear, polos and outerwear, giving your brand a professional, textured finish.
It can make staff apparel feel more polished, especially for front-of-house teams, hospitality businesses or customer-facing roles, and it’s often used for polos, caps, jackets, workwear and other pieces where you want a more structured look.
Because embroidery has physical texture, it can be a strong choice for simple logos, but very detailed artwork, tiny text or photo-style designs may work better with print.
Here’s a quick look at how these types of T-shirt printing methods compare across different business needs so you can learn how to print a T-shirt that fits your budget:
| Method | Good for | Setup considerations | Texture profile | Fabric notes |
|---|---|---|---|---|
| DTG printing | Smaller orders, detailed artwork, photo-style designs | Usually lower setup than screen printing | Soft, integrated feel | Works best on cotton-rich shirts |
| Screen printing | Larger orders, bold logos, simple color palettes | Each color may need its own screen | Slightly raised, durable feel | Works on many cotton, poly and blend options |
| DTF transfer | Bold color, flexible fabric choice, smaller runs | Transfer film is applied with heat | Smooth, thin film layer | Can work across a wider range of fabrics |
| Embroidery | Polos, caps, workwear, simple logos | Stitch count and design complexity affect setup | Textured, premium thread | Best for simple designs and sturdier fabrics like heavy cotton, knits and polyesters |
Fabric fundamentals: Choosing the best textile for your brand
The canvas you choose is often just as important as the design itself. It affects how your design looks, how the print feels and how often people actually wear it. So, how do you choose the right T-shirt fabric for custom printing? The best place to start is how the shirt will be used.
For everyday comfort, cotton is often a strong place to start. Standard cotton can work well for budget-friendly staff shirts, giveaways and event apparel. Ring-spun cotton usually feels softer because the fibers are spun into a finer, smoother yarn. That smoother surface can also help printed artwork look cleaner, especially when your design includes small details or softer color transitions.
For active roles, outdoor teams or uniforms that need more structure, cotton blends or polyester blends can be a strong choice. They often hold their shape well, resist wrinkles and suit workwear that needs to move through a busy day. For active service businesses like plumbing or landscaping, the right blend can help balance comfort, durability and movement.
If sustainability is part of your brand values, look for options such as organic cotton, recycled polyester or apparel designed with lower-impact materials.
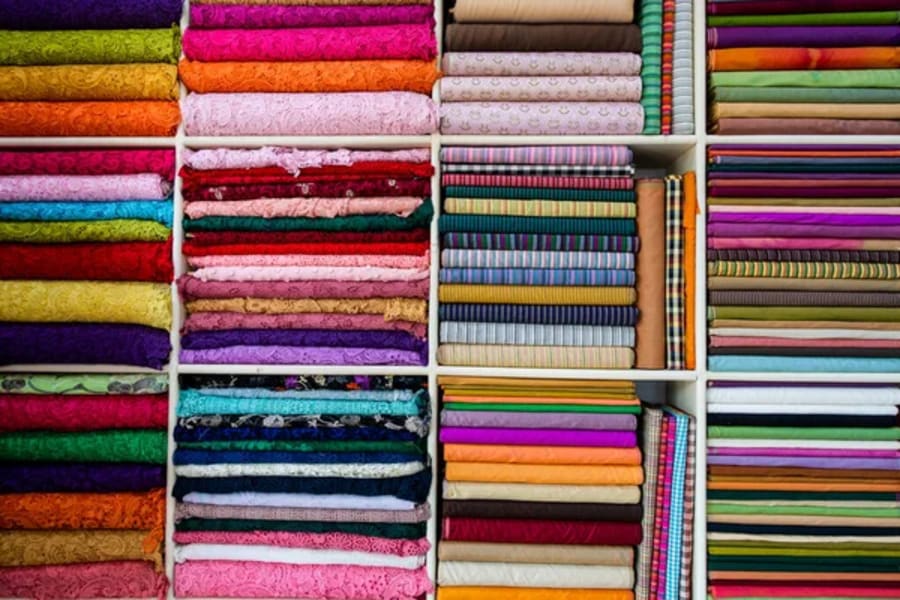
Choosing the right fabric can affect how your custom T-shirt looks, feels and holds up with regular wear. Source: via depositphotos
Organic cotton and recycled polyester can help reduce reliance on some conventional materials, while still giving you practical options for branded apparel. They can also help your apparel feel more aligned with a brand that already talks about sustainability, wellness or community values.
Whatever you choose, match the fabric weight, stretch and feel to the job the shirt needs to do. The better the shirt feels in real use, the more likely people are to keep wearing it.
For active teams, check out which T-shirt material is best for gym environments to keep workers cool. And if your apparel plan includes cold-weather layers, our guide to the best blank hoodies for printing can help you choose pieces that work with custom designs, keeping your team warm and stylish all winter.
The transparency playbook: How to prevent the “sticker effect”
One of the most common mistakes in custom apparel design is accidentally creating the “sticker effect.” This happens when a designer leaves a solid white background bounding box around their digital logo. That box might look harmless on screen, especially if you’re designing on a white canvas. But in a print file, visible white space can be read as part of the design, which means it may be printed onto the shirt.
The result is a thick, plastic-like rectangle around the artwork rather than a clean logo that sits naturally on the fabric. It can also make the print feel heavier than it needs to, especially on larger chest designs. Your team will appreciate the difference, as a breathable print is infinitely more comfortable during long shifts. Plus, a transparent background also gives you more flexibility when testing the same logo on different shirt colors.
To avoid the sticker effect, prepare your artwork with a transparent background where the shirt fabric should show through. Here’s a simple, step-by-step guide to doing this in common design platforms:
- In design tools like Photoshop, Adobe Illustrator or Canva: Remove any background layer you do not want printed, then export the artwork as a transparent PNG if that format is suitable for your order. Preview it on a dark background before uploading so you can spot stray white edges or pixels.
- Use transparency correctly: For raster files, make sure the transparent areas stay transparent when you export. In tools like Photoshop, that usually means deleting or hiding the background layer and saving in a format that supports transparency.
- Use vector files or logos when possible: SVG, PDF or other vector files are often a strong choice for logos, icons and text because they define the shape of the artwork without relying on a background box. They also scale more cleanly than low-resolution images, which is useful if you need the same logo across different apparel sizes or products.
Taking a few minutes to check transparency before ordering helps your logo look cleaner and helps avoid an unwanted block of ink around the design.
From screen to shirt: How color changes in custom printing
Have you ever designed a vibrant neon logo on your laptop, only to find that it looks muted and dark once printed on a physical shirt? This common issue is known as the color translation disconnect, which happens because screens and fabrics create color in different ways.
Screens use RGB, which mixes red, green and blue light. Printed garments use physical inks, pigments or threads, which can behave differently depending on the fabric, print method and shirt color. Because screens glow and fabric absorbs light, colors may not transfer exactly from screen to shirt.

Colors can look different on screen than they do printed on a T-shirt, so it helps to check swatches and previews before finalizing your T-shirt design. Source: via depositphotos
Very bright or neon colors are often harder to match exactly, especially on darker fabrics or textured materials. You can reduce surprises by setting up your colors with the final product in mind.
- Check your color mode: If you’re working in a design tool, check whether your file should be set up in RGB, CMYK or another recommended profile for the product and print method. A CMYK preview can sometimes give a more realistic sense of printed color than a bright RGB screen.
- Use Pantone or brand color references when needed: If your logo has a specific brand color, provide the closest Pantone, hex or brand guideline reference you have. Pantone matching can help with consistency, especially for simple logo colors, but fabric and print method can still affect the final look. If color accuracy is especially important, check the available options before ordering.
- Test your color combinations: A design that works on a white tee may not stand out on navy, black or forest green. Reviewing T-shirt color combinations can help you choose pairings with enough contrast to pop against your selected fabric.
The goal is not perfect screen-to-shirt matching every time. It is to make informed color choices so your finished apparel still feels consistent, readable and on brand.
Sizing logistics: Managing multi-garment bulk orders
Ordering custom T-shirts for a team, event or business means thinking beyond the artwork. Start with fit and fabric behavior. Some cotton shirts may shrink more than blends or pre-shrunk options, especially if they are washed or dried with heat. If fit is important, check the size guide, fabric details and care instructions before ordering.
Different fabrics behave differently, so avoid assuming every shirt style will fit the same after repeated washes. Pre-shrunk options are designed to reduce shrinkage, but care instructions still matter.
Next, think about how the design scales across sizes. A design that looks balanced on one shirt size may feel too small on a larger size. On a smaller size, the same artwork may feel too large or sit too close to seams. The goal is to keep the design feeling proportional across the full order.
A few simple checks can help:
- Check the size range: If your order includes very small and very large shirts, review whether one artwork size still looks balanced across the full range.
- Use the product preview carefully: Check how the design sits on each shirt style and size where possible, especially for large front prints.
- Collect sizes early: For team or event orders, use a simple size sheet before you order so you are not guessing quantities at the last minute.
- Plan a small buffer: If the shirts are for staff, volunteers or event attendees, consider whether you need a few extras in common sizes.
A little planning upfront can help you avoid missing sizes, uneven-looking designs and apparel that never gets worn.
Design placement: Framing your brand
Where you place your design on a shirt is just as important as the design itself. A great custom T-shirt printing guide will tell you that correct placement is what separates an amateur shirt from a high-end, professional corporate uniform. If you’re deciding where to print custom T-shirts, start with the role the shirt needs to play.
For 2026, we’re seeing a strong shift toward clean typography, retro-inspired branding and minimalist left-chest placements.
A full-front print is a strong choice for merch, giveaways, team events or designs that need to be noticed quickly. A left-chest logo is often better for staff uniforms, polos, trade shows or customer-facing roles where you want the brand to feel visible but understated. It works well with structured shirts and keeps the focus on the person wearing it, not just the logo. That can help staff apparel feel polished without making the branding feel too loud.

Design placement can make a big difference to how professional your custom T-shirt looks. Source: via depositphotos
To learn more about positioning your graphics perfectly, check out our T-shirt design placement guide, take a look at the standard T-shirt design sizes or get inspiration for placing your logo on T-shirt layouts. Just remember to choose the placement that matches the purpose. Merch can be bolder. Staff apparel often works better when the branding is clear, readable and easy to wear every day.
Final checklist before you order custom apparel
Before you upload your artwork and finalize your custom apparel order, take a moment to run through this final checklist. A quick review can help you catch file, sizing or color issues before they affect the finished shirt.
- Transparent background: Have you removed any unwanted white boxes or background layers from your artwork?
- Print method: Have you matched your method to the artwork, fabric and order size?
- Sizing and fabric: Have you checked the size guide, fabric details and care instructions?
- File quality: Is your logo sharp, is small text readable and is the file high enough resolution for the final print size?
- Color setup: Have you checked how your design colors work against the shirt color you chose?
To help printed or embroidered apparel last longer, follow the product care instructions. Washing inside out, using cold water and avoiding high heat can help protect the print, thread and fabric.
Create custom T-shirts that work for your business
The right custom T-shirt printing setup depends on what you’re creating, how many shirts you need and how the finished apparel will be worn. Once you understand the method, fabric, file setup, color choices, custom T-shirt printing cost and placement, it becomes much easier to make confident decisions.
Custom T-shirt printing FAQs
Which is better for my design: Screen printing, DTG or embroidery?
Screen printing is a strong choice for larger orders with bold designs and limited colors. DTG works well for detailed artwork, photo-style designs and smaller runs. Embroidery is best for simple logos, polos, caps or workwear where you want a textured, premium finish.
How do I choose the right T-shirt fabric for custom printing?
Start with how the shirt will be used. Cotton is a strong option for everyday comfort, while cotton blends and polyester blends can work well for active teams, uniforms or apparel that needs more structure. Also think about print feel, stretch, care instructions and how often the shirt will be worn.
What are the most popular custom T-shirt design trends for 2026?
Popular custom T-shirt design trends for 2026 include clean typography, retro-inspired branding, minimalist left-chest logos and simple layouts that feel easy to wear. For business apparel, the strongest designs usually balance visibility with restraint.
What file resolution and format do I need for a professional T-shirt print?
Use a vector file where possible, such as a PDF or SVG, especially for logos, icons and text. For raster artwork, use a high-resolution file prepared at the final print size. Transparent PNGs are often useful when you want the shirt fabric to show around the design and avoid unwanted background boxes.
How can I make my custom T-shirt project more eco-friendly?
Look for apparel options made with materials such as organic cotton, recycled polyester or lower-impact fabrics where available. You can also reduce waste by ordering carefully, checking sizes before production and choosing designs people will want to wear repeatedly.