Deciding how to design custom mugs for friends, family or consumers is one of those delightful projects that packs a big punch. You get something you’ll actually use, gift or sell—and you don’t need an art degree or a home studio to make it happen. In this guide, we’ll walk through how to design personalized mugs from idea to order, show you smart choices for styles and finishes and give you custom mug design tips, so your design prints as beautifully as it looks on your screen.
- Start with the mug style first, it determines size, print area, color options and how your art should wrap.
- Prep high-resolution art (aim for 300 ppi at print size) and keep critical text within safe margins.
- Curved surfaces distort, design in a flat template and test with a paper wrap to preview placement.
- Contrast and finish matter. Matte mutes colors slightly, glossy makes colors pop but can glare.
- Before ordering, preview, proofread and check alignment near the handle, tiny shifts are most noticeable there.
Why custom mugs?
Mugs are everyday billboards for your personality or brand. They’re affordable, durable and seen multiple times a day. Whether you’re celebrating a milestone, promoting a business or launching a small merch line, a well-made mug is useful, collectible and surprisingly memorable. Plus, if you’ve been wondering: “how to personalize my custom mug?”—without getting overwhelmed—the process is simpler than you think.

Mug use-case inspiration
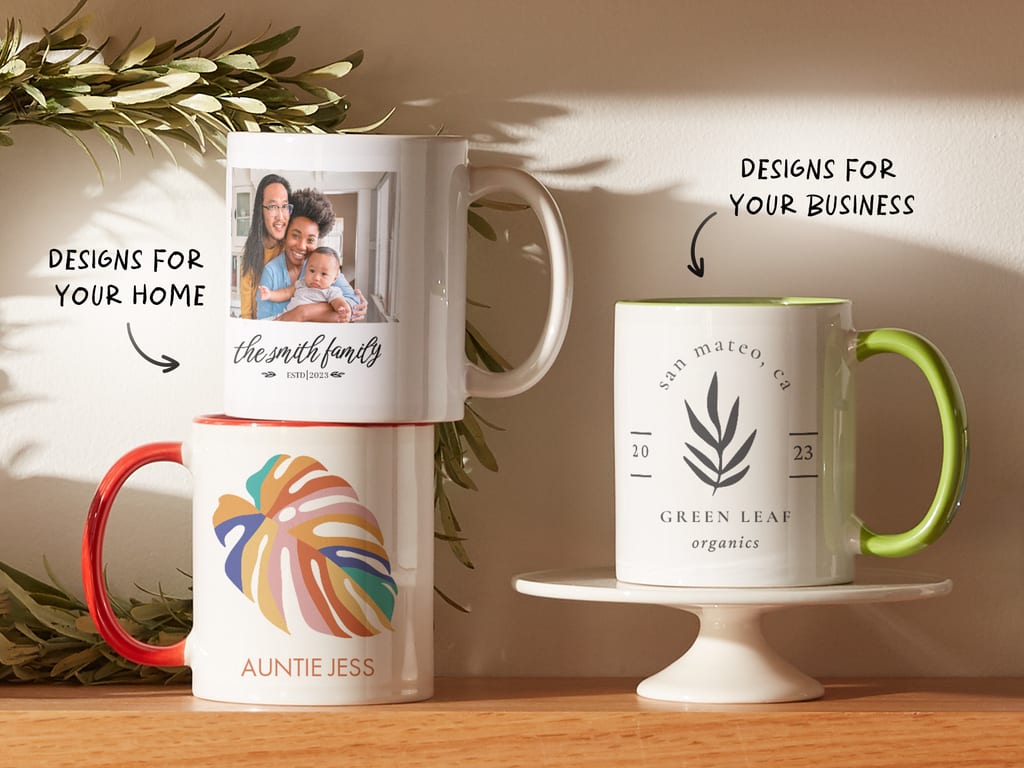
- Consumer and personal: Gifts with inside jokes, family photos, pet portraits or a personal mantra you actually want to read at 7 a.m.
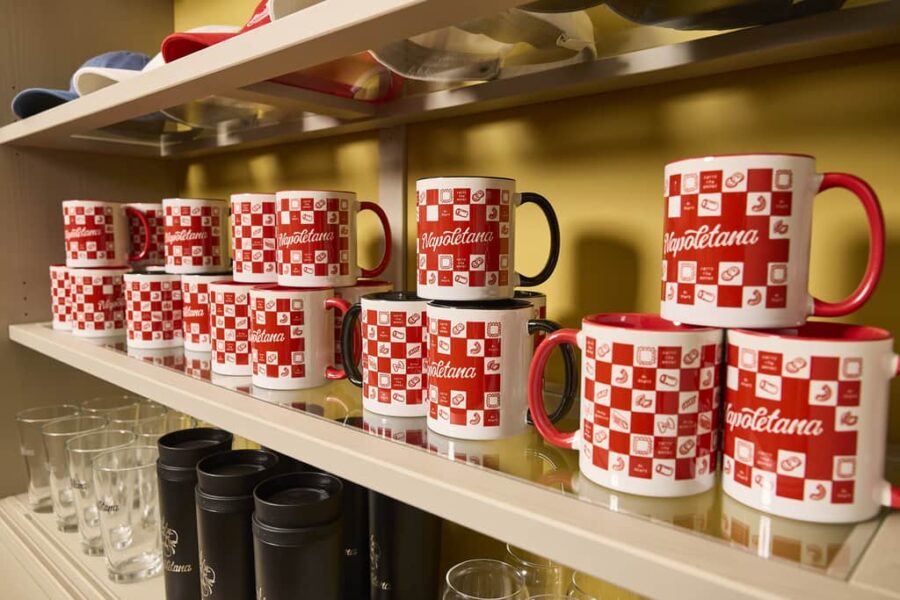
- Business and promotional: Logo mugs for office kitchens, client thank-yous, trade-show giveaways or swag packs that won’t end up in a junk drawer.
- Seasonal and event driven: Limited-run holiday art, wedding favors, reunion keepsakes, fundraising merch or conference mugs you’ll still use next year.
Choosing the right mug style
Choosing the mug style first is non-negotiable, it sets the print area (how much space you can design in), whether the art wraps around or sits in panels, the surface finish and even the color choices. That, in turn, shapes your layout, image resolution and how you prepare files. Take time to decide the form factor before you open your design software, it’ll save you from re-doing art later.
Classic coffee mug
This is the everyday 11-oz hero with balanced size, a friendly handle and broad compatibility with most printers. Great for centered logos, short quotes and small illustrations. If you’re new on how to make a photo mug, this is a forgiving starting point.
Large coffee mug
Think 15-oz or bigger, more caffeine and more canvas. The extra width gives room for panoramic art, multi-photo collages or longer typography. Just remember: larger wraps mean more area to align around the handle.
Enamel Mug
A staple of camping chic, these mugs are lightweight with a metal rim. Colors can print slightly differently on enamel than on ceramic and surfaces may show subtle speckling (part of their charm). Keep designs simple, high-contrast and avoid tiny text.

Thermal mug
Insulated travel mugs with lids are ideal for commuters. Print areas are often narrower and vertical. Choose bold, legible graphics and avoid sprawling wraps. If you want a travel mug your brand ambassadors actually use, pick high-contrast art and big type.
Magic color-changing mugs
The heat-sensitive coating in these mugs hides your design until hot liquid is added. They’re fun for reveals—think “before coffee / after coffee” jokes or surprise messages. Since the coating can slightly mute colors, lean on strong contrasts.
Novelty mug
This includes mugs with odd shapes, sculpted handles or unique silhouettes. Expect smaller or oddly placed print zones, plan for a spot graphic rather than a full wrap. Test placement carefully.

Photo mug
This option is a classic for family pics, pets or travel moments. Use a single hero image or a clean grid of two to four shots. If you’re wondering how to make a photo mug look professional: crop thoughtfully, keep faces away from the handle seam and stick to crisp, well-lit images.
Step-by-step design guide
Below is a general, friendly walkthrough using VistaPrint’s online custom mug designer as an example, but will apply to any software you may choose. Interfaces update from time to time, but the flow remains similar, so focus on the what and why as much as the where.
Step 1: Gather assets
Collect your logo files (SVG, AI or high-res PNG), photos (originals if possible), color values (CMYK color codes are preferred for printing) and your copy. If you’re not sure about layout, sketch a quick idea or pull reference styles. This is also the moment to revisit the principles of design: contrast, alignment, repetition and hierarchy, to keep your mug readable at a glance.

Step 2: Log in and select product
Sign in, search for “custom mugs” and select which mug type you want to design. Select color, quantity and “Browse designs” or “Upload design”, depending on whether you’re going for a template or creating your own design from scratch. Select the number of photos (if using) then click “Edit design.”
Step 3: Upload and arrange artwork
Upload your images or logos, then drag them onto the mug canvas in the design panel. Choose your best image, crop to the safe area and consider a subtle border or background color. Keep critical details away from the handle seam and slightly above the bottom and below the top edges where curvature is strongest.
Step 4: Add text and brand elements
Drop in your headline, names or tagline. Stick to one to two fonts for clarity. If it’s a business mug, this is branding design in micro. Use your primary typeface, brand colors and maybe a tiny URL or social handle on the backside. Keep small text no smaller than approximately 10 to 12 point at print size (bigger for script fonts).

Step 5: Color and finish decisions
Finalize your mug color, graphics, background color and patterns. Note that dense, fully-wrapped dark backgrounds can show minor banding if over-compressed. Use high-quality, solid color fills to avoid issues.
Step 6: Final checks and ordering
Use the preview tools, make good use of the Live 3D animation panel to really get a feel for it, spin the mug, confirm alignment near the handle and proofread. Once happy, click “Next.” Here, you will be able to do your final review. When everything looks perfect, click the box “I have reviewed and approve my final design” then “Continue” to proceed to verify quantity, add to cart, review shipping options and order.
If you’re producing for an event, build in a buffer. (If timing is tight, split the order: one fast small batch to proof in-person, then the remainder.)
Design tips/guidance for optimal print result
This is the section to bookmark. Consider it your pocket list of custom mug design tips to dodge the most common pitfalls and nail the final print.

Designing for curved surfaces
- Mind the wrap seam: Most full-wrap prints meet near the handle. Avoid placing faces, intricate patterns or vertical lines right at the seam.
- Use safe zones: Keep important text or logos at least ⅛–¼ inch inside the top, bottom and side margins.
- Do a paper test: Print your design on plain paper at size, wrap it around a similar mug and tape it near the handle. Seeing it in 3D catches spacing issues a flat screen can’t.
- Favor horizontal flow: Long horizontal graphics read more naturally around a curve than tall vertical blocks.
Optimal image resolution
- Aim for 300 ppi at print size: If the printable area is, say, 8.5 inches × 3.5 inches, your file should be about 2550 × 1050 pixels (8.5 × 300 = 2550; 3.5 × 300 = 1050).
- Bigger is fine, upscaling isn’t: Don’t enlarge small images, it softens detail. Choose another photo or redesign to fit a smaller panel.
- Sharpen gently: A light, final sharpen (not oversharpened halos) helps on ceramic surfaces.
- Color space: Many printers convert to CMYK. Design in RGB if required by the tool, but keep highly saturated neon tones in check, they can dull when converted.
Finish and color interaction
- Glossy finish creates brighter, crisper graphics: Great for photos and high-contrast graphics.
- Matte finish has a softer and more artsy effect: Expect slightly lower contrast, boost mid-tones to compensate.
- Dark mugs need light art: If the mug itself is dark, use white or bright ink. Alternatively, you can add a light panel behind your design for readability.
- Heat-sensitive coatings (magic mugs): They can slightly mask fine details, go for bolder shapes and thicker strokes.
Logo and photo placement do’s and don’ts
Do:
- Center a single logo opposite the handle or place logos on both sides for left and right-handed sippers.
- Crop photos so the subject sits away from the seam and doesn’t bend around the tightest curve.
- Use consistent margins around patches or panels so the design looks intentional.
Don’t:
- Set small script fonts near the bottom curve, they’ll feel compressed.
- Wrap fine vertical stripes across the seam, even perfect alignment can look “off” with tiny shifts.
- Fill edge-to-edge with a busy pattern, unless it’s part of the aesthetic. Leave breathing room.
Creative design ideas for mugs
Personal
Heartfelt and heartwarming win the day for personal mug designs. Examples include a handwritten recipe from a grandparent (scan the card), a pet line-art portrait, a “year in review” collage (the perfect excuse to create your own photo book as a companion gift) or a daily affirmation in a bold serif font.
Promotional
These ideas will help your brand stand out. Try a minimal logo with the brand color as the interior, a campaign hashtag, QR code to a landing page or a product illustration. If you’re designing other materials, keep your look consistent with your branding design playbook.
Seasonal
These designs are perfect for holidays or events. They range from cozy winter patterns, Christmas mugs, cheeky Valentine puns, or graduation dates with school colors. For business events, like a pop-up café launch, create a limited-edition illustration for your mugs. Carry the theme to additional print materials like posters, business cards or even a restaurant menu redesign.

The everyday companion built to last
If a mug can survive Monday mornings and office dishwashers, it can survive anything—so make yours worth seeing every day. Start with the right style, prep crisp art, respect the curve and trust your preview. Whether it’s one mug for your dad or a hundred for your conference, you now know how to design custom mugs without any guesswork. Now go forth and create your perfect mug!
If you want more layout fundamentals, brush up on the principles of design.
For a refresh on brand consistency, revisit your branding guidelines.
And, if your project grows beyond mugs, you might also love learning how to make/print a booklet for events or to create your own photo book as a matching gift.
FAQs about designing a personalized mug
What is the best way to design a custom mug?
Because it determines your printable area and how the art will curve, start by choosing the mug style: classic 11-oz, large wrap, enamel, thermal, magic, novelty or photo. Next, gather high-resolution assets and design inside a proper template (or the online tool’s design editor), keeping important elements away from the handle seam and edges.
How do I make a photo mug at home or online?
Online is easiest: upload your best photo to a mug product page, crop within the safe area and preview. For that polished look, pick a well-lit image, avoid heavy filters and leave space around faces so they don’t bend near the handle.
What file size and resolution should I use for printing on mugs?
Use 300 ppi at the actual print dimensions. Example: if your printable width/height is 8.5 inches × 3.5 inches, set your canvas to 2550 × 1050 px. Keep a vector type if possible (SVG/PDF/AI) or export high-quality PNG. Leave a margin of at least ⅛–¼ inch inside all edges for safety, and avoid placing critical content across the seam.
What fonts and colors work best on custom mugs?
Choose simple, legible faces—a clean sans (Inter, Helvetica, Avenir) or a sturdy serif (Georgia, Freight Text). If you use a script, increase size and tracking. For colors, high contrast wins, dark text on light backgrounds or vice versa. Test brand colors against your mug’s finish: glossy supports vibrant hues, while matte softens contrast.
How long does it take to receive a personalized photo mug?
Production and shipping times vary by vendor and season. Plan on a few business days for production plus standard shipping. If you need mugs for an event or holiday, order early and consider a small, rush batch first to verify the look in hand.