Good restaurant menu design sets the tone, sells your story and quietly nudges diners toward your best dishes. It’s part design project, part marketing strategy and entirely worth getting right. From menu layout ideas and item description tips to finishes and printing options, this step-by-step guide will walk you through how to design a menu for a restaurant that feels on-brand and drives sales.
- To design a restaurant menu, you need to understand your target audience, choose the right menu type and create a clear layout.
- Menu layout ideas include organizing dishes by course, highlighting specials and using visuals or icons to guide attention.
- To keep restaurant menu design on-brand, use consistent colors, fonts and imagery that reflect your identity and branding.
- The best practices for restaurant menu design include ensuring alignment and limiting clutter.
- When printing a restaurant menu, choose professional services like VistaPrint for high-quality materials, accurate color printing and durable finishes.
How to design a menu for a restaurant step-by-step
A well-designed menu doesn’t happen by accident. It involves knowing your audience, choosing the right format and mapping out a layout that feels effortless to read. From planning your sections to adding mouth-watering visuals and writing copy that sells, every design choice matters.
Step 1: Understand your target audience
Every restaurant menu design decision starts with knowing who’s sitting at your tables. Different audiences interact with menus differently, influencing what they notice, how they decide and ultimately what they order.
For instance, families seek comfort and clarity, professionals want speed and structure, and students respond to energy and deals, while fine diners appreciate restraint and elegance. This understanding helps you design with intention—using layout, color and language to guide design choices. It’s a key part of restaurant branding and menu design that feels created for your guests.
Here’s how to design a menu for different audiences:
- Families with kids: Use simple layouts, larger fonts and kid-friendly sections to help parents order quickly, and build trust with clear allergen icons.
- Professionals on lunch breaks: Use streamlined categories, quick-scan combos and callouts like “ready in 15 min” to appeal to the fast-paced mindset.
- Students and young diners: Use bold colors, apply font trends and group value meals to make the menu feel lively, current and affordable.
- Regulars and locals: Use story-driven descriptions, seasonal highlights and artisanal touches to create a familiar, community-focused feel.
- Fine dining guests: Use minimalist layouts, elegant typography and refined dish names to reinforce quality and exclusivity.
When you design with real diners in mind, every choice—visual or verbal—works harder to connect your brand to your audience.
Step 2: Decide what type of menu you need
Once you understand who you’re designing for, the next step is to align the menu type with your restaurant. The format influences how guests interact with your offerings: what catches their eye first, how quickly they make decisions and how confident they feel about ordering.
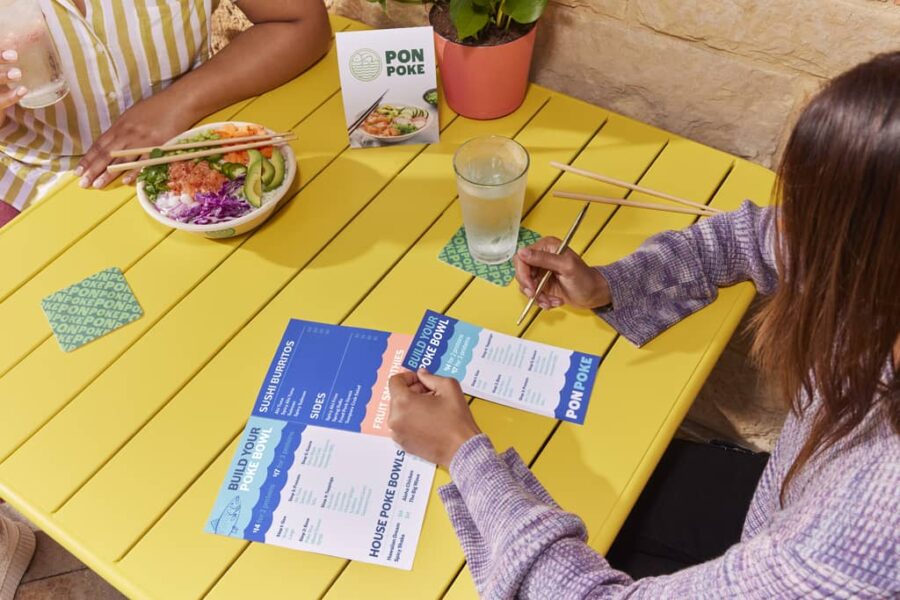
Bi-fold menu design
Printed menus—the most common and versatile choice—come in several formats:
- Flat menus: A single sheet that presents your selection at a glance. Perfect for cafés, bakeries and bars with compact menus or rotating daily specials.
- Bi-fold menus: Folded to create four panels (a front cover, two inner pages and a back), this menu layout offers structure and balance, ideal for casual dining spots or bistros that want clear sections.
- Tri-fold menus: Folded twice into three panels, providing six sections, this compact format is perfect for takeaways, food trucks or delivery restaurants that need extra room for combos or featured items.
- Multipage menus: A staple for large restaurants or venues with wide selections, this booklet-style option is great for showcasing detailed wine lists, tasting menus or chef specials.

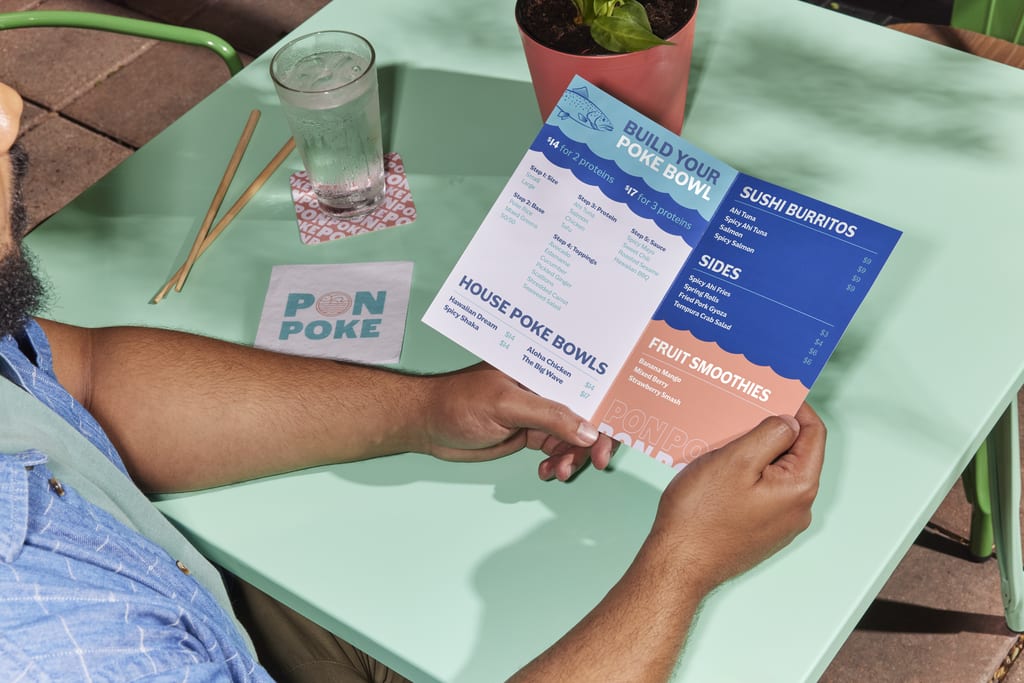
Flat menu design
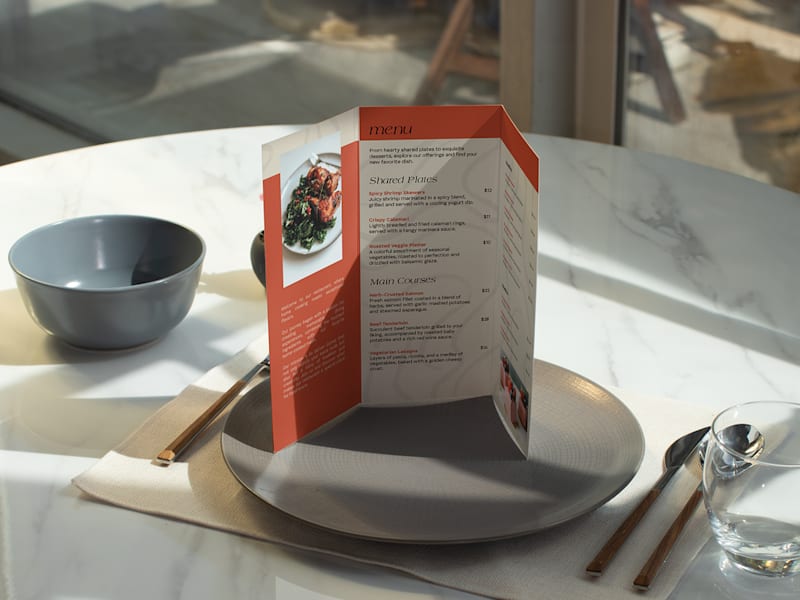
Tri-fold menu design
Alternative menus, like tabletop displays and QR code stickers, might suit restaurants looking for flexibility or a modern twist.
For more on how to choose the best type of menu for your restaurant, read our guide on the different types of printed restaurant menus.
Step 3: Design the layout for your menu
Your choice of menu type naturally influences your layout. A bi-fold or tri-fold menu limits how much space you have on each panel, while a flat or multipage format provides area to spread out information. Regardless of size, a clear layout helps guests find what they want quickly and highlight the dishes you want them to order.
Since diners rarely read menus from top to bottom, the best menu layout ideas start with understanding basic eye-tracking principles. Most people’s eyes follow a “golden triangle” path—from the top right, across the top center and then to the top left. These areas are prime space for your best-selling or highest-margin dishes.
To keep your restaurant menu design clean and easy to follow:
- Organize logically: Group items by course or category, like appetizers, mains, desserts and drinks.
- Use visual hierarchy: Category titles should stand out most, followed by dish names, then short descriptions in a smaller, lighter font. This flow helps readers scan naturally.
- Highlight strategically: Limit two or three boxes, icons or callouts per page to avoid visual overload. Place featured dishes within the “golden triangle” for maximum visibility.
- Limit options: Aim for five to seven dishes per section. Too many choices slow decision-making.
- Add guiding cues: Use small icons to flag vegan, vegetarian or gluten-free options, and add short “bestseller” or “chef’s pick” tags to guide attention.
Restaurant menu layout ideas
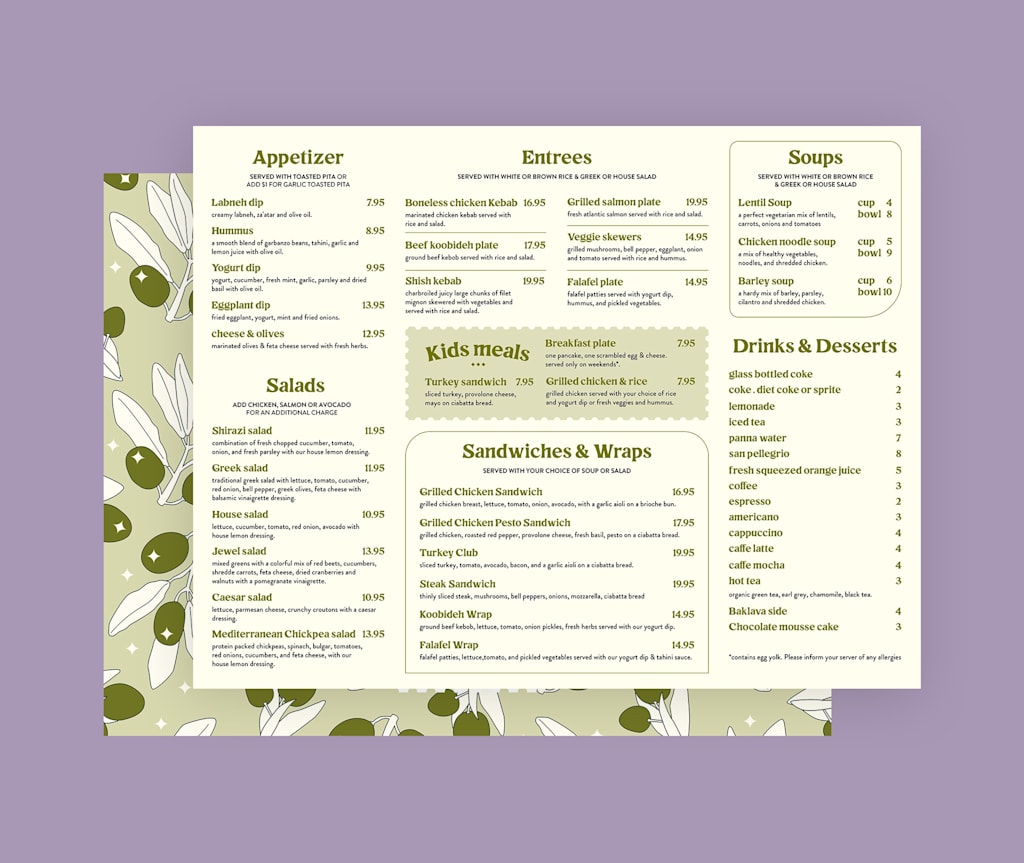
By course: The most traditional menu format. Appetizers, then mains, followed by desserts and drinks creates a natural flow that mirrors the dining experience and keeps the decision process straightforward.

Source: Restaurant menu design by RELKHARAC via 99designs by Vista
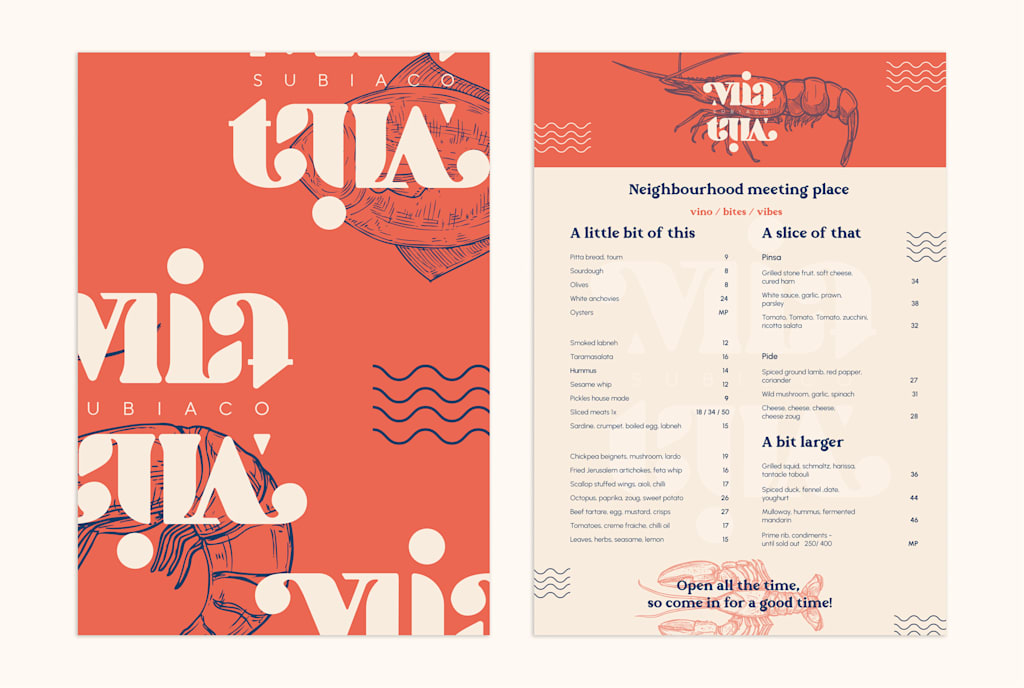
By ingredient or category: Perfect for cafés or casual spots. Group items under category labels like “Chicken,” “Seafood” or “Vegetarian” to help guests find what they want fast.
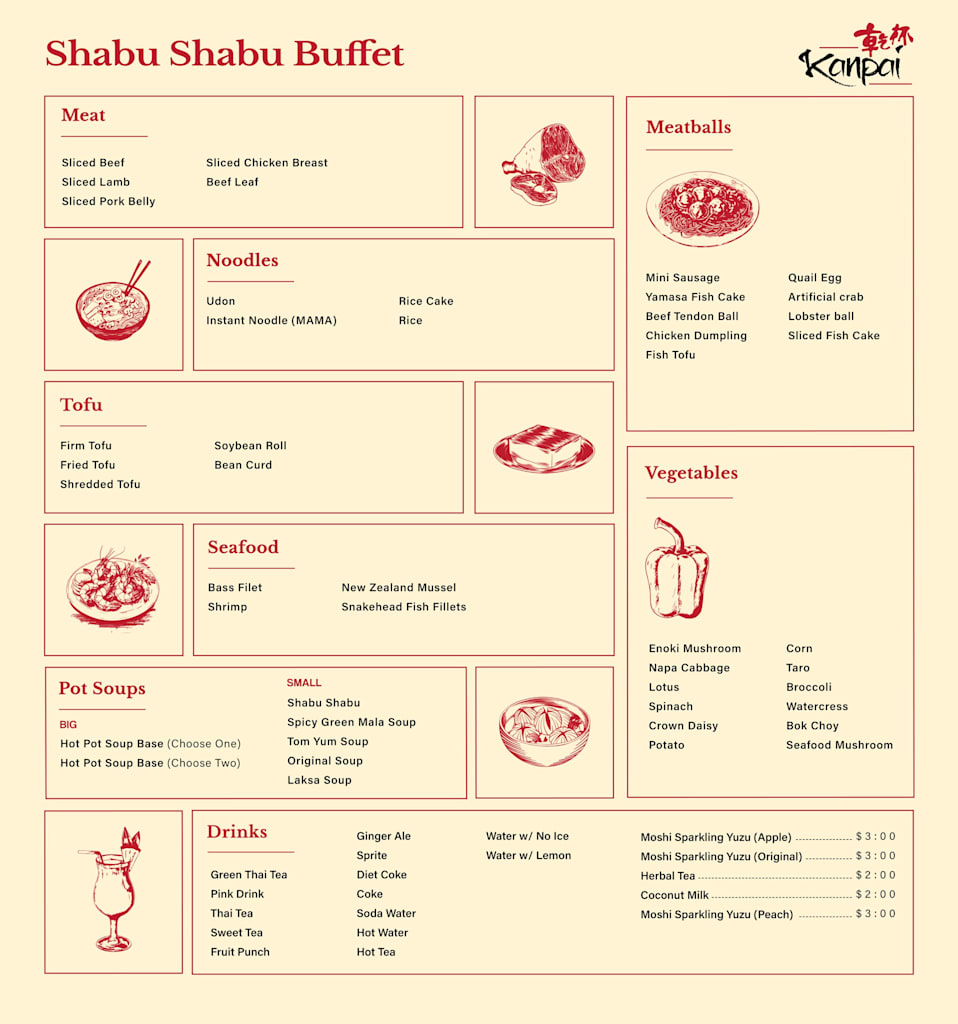
Source: Buffet restaurant menu design by | Aquarian | via 99designs by Vista
Chef’s specials or customer favorites section: Include a separate block or sidebar for menu highlights or to feature popular and high-margin dishes.

Source: Restaurant menu design by SimpleIsGood via 99designs by Vista
Visual-led layout: Combine clean sections with high-quality photos or icons. This menu format suits restaurants with strong visual appeal, where imagery can drive appetite and sales.

Source: Restaurant menu design by Stefano Okti via 99designs by Vista
Tasting or set menu layout: A linear, minimal format listing courses in sequence—ideal for fine dining. This format keeps focus on experience rather than choice, guiding guests through a curated journey.

Source: Tasting menu design by kalayaphilly via Instagram
Choosing the right layout helps your menu feel intuitive and cohesive while keeping attention where it matters most—on your best dishes.
Step 4: Apply branding, fonts and colors
Once your layout is set, the next step is to make your menu look and feel yours. Every visual element—fonts, colors and logos—should reflect your restaurant brand’s identity, personality and atmosphere. Start by weaving in your restaurant’s branding elements from your brand style guide.

Source: Branded restaurant menu design by Alshimaa Mou via 99designs by Vista
Use an accent color from your logo or branded merch to tie the menu design together and create a cohesive brand experience.

Source: Menu design by lantonx via 99designs by Vista
When it comes to typography, clarity always wins. Use one or two complementary, easy-to-read fonts across:
- Category titles: A bold serif or modern display font (like Playfair Display or Montserrat) adds personality and hierarchy.
- Dish names: Use a clean, readable font such as Open Sans, Lato or Poppins.
- Prices and details: Keep them small but legible, ideally in a lighter weight or neutral style to avoid visual clutter.
Source: Restaurant menu design by Alshimaa Mou via 99designs by Vista
Color psychology also plays a role in restaurant menu design, with your choice of color palette subtly influencing appetite, mood and brand perception:
- Red and yellow: Stimulate appetite and energy—great for fast food, casual or family restaurants.
- Green: Communicates freshness, nature and balance—ideal for vegan, organic or healthy menus.
- Monochrome or neutrals: Suggest sophistication and restraint—perfect for fine dining.
- Blue: Conveys calm and trust but should be used sparingly, as it can suppress appetite.
- Earthy tones: Warm and approachable, these tones work well for bakeries, cafés and comfort spots.

Source: Juice bar menu design by Miss Rose via 99designs by Vista
Step 5: Add images, illustrations or icons
Visuals can enhance your menu, but they’re not essential—many great menu designs rely on text, spacing and color. Whether to include imagery depends on your audience, brand style and marketing strategy.

Source: Restaurant menu by Sangaji Aristo via 99designs by Vista
Imagery helps to showcase signature dishes, add personality, help guests visualize your dishes (especially if they’re unfamiliar) and break up text-heavy layouts. But images may be unnecessary if your priority is a clean, easy-to-scan layout or if your brand aesthetic is minimalist or elegant.
Once you’ve decided that visuals belong on your menu, the next question is what kind. Depending on your brand personality and the space available, choose:
- Photos: Visuals can drive appetite—think desserts or bestsellers. They’re direct and effective but should be used sparingly in most cases.
- Illustrations: Use them to illustrate details, like glass shapes or ingredients, or to for brand storytelling.
- Icons: Make menus easier to read. Use them for dietary information, spice levels or chef’s specials.
Even easily recognizable icons need a legend, ensuring clarity and giving your menu a professional finish.

Source: Restaurant menu design by soli.nonics via 99designs by Vista
Only include high-quality photography. A photo sets an expectation—guests expect their meal to look the same. Always photograph real dishes from your kitchen, under natural lighting, without heavy editing.

Source: Restaurant menu design by Rose ❋ via 99designs by Vista
Source: Acai bar menu design by Alshimaa Mou via 99designs by Vista
Step 6: Write engaging descriptions
Your menu copy should build anticipation. Keep descriptions short, specific and focused. Use sensory and descriptive words that capture flavor, texture and freshness, without sounding over the top (unless that’s a part of your brand personality!)
These words and phrases work well:
- Texture: Crispy, tender, velvety, crunchy
- Flavor: Smoky, tangy, savory, sweet, spicy
- Preparation: Slow-roasted, hand-tossed, chargrilled, oven-baked
- Quality: Freshly made, locally sourced, organic, seasonal
Highlight premium ingredients, sourcing information and cooking methods to communicate quality.
Your menu copy should reflect your brand’s personality. A fine-dining menu should use elegant, minimal phrasing, while a casual café might sound warm and conversational. Apply the same tone across dish descriptions, category names and headings to keep your brand voice consistent.
Source: Restaurant menu design by Zhaklina Levi via 99designs by Vista
To make your restaurant menu design even more valuable, add elements of brand storytelling.

Source: Restaurant menu design by Marcy_McGuire via 99designs by Vista
Step 7: Check compliance and transparency
Before you finalize your restaurant menu design, check that your menu meets all legal and safety standards. Transparency builds trust, and a compliant menu shows professionalism as much as good design does.
Clearly list allergen information and identify ingredients such as nuts, dairy, gluten or shellfish to protect guests and avoid liability. Include clear indicators for dietary preferences such as vegetarian, vegan or gluten-free, and ensure any “organic” or “locally sourced” labels are accurate and verifiable.
Regulations vary by region, so review your local food labeling and disclosure laws before printing menus.
Restaurant menu and design: Best practices
By now, you should understand how to design a menu, from knowing your audience to perfecting your layout and visuals. Before sending your file to print, read through these best practices, making sure your menu is polished, professional and consistent with your restaurant branding and broader food branding strategy.
- Match menu layout to restaurant type: A sleek single-page design suits fine dining, while bi-fold or tri-fold menu formats work better for cafés and takeaways.
- Be consistent with alignment: Keep margins, spacing and text alignment uniform across all sections.
- Highlight strategically: Use boxes, icons or subtle color shifts to subtly draw attention to key dishes.
- Apply best principles of design: Maintain balance, hierarchy and plenty of white space.
- Double-check details: Proofread for typos, pricing mistakes, spacing errors and check photo quality.
- Print a test: Colors look different on screen than in print. A quick test print helps confirm that hues and contrast appear as intended.
Following these final checks ensures your menu looks good and feels cohesive, trustworthy and brand-aligned.
How to design and print restaurant menus
Once you’ve finalized your content and layout, it’s time to bring your design to life. Here’s how to choose the right design software, paper stock and finishes that complement your restaurant’s look.
Menu design software
Design tools like Adobe InDesign, Illustrator and Photoshop provide full creative control, but require design know-how and time to master. VistaCreate and VistaPrint’s built-in editor, on the other hand, offer ready-made restaurant menu templates that you can easily customize using intuitive design tools.
Choose your printing material and finish
The right paper stock and finish depend on your restaurant and how often the menu will be handled:
- Matte: Reduces glare and offers a smooth, elegant look—ideal for upscale restaurants.
- Glossy: Makes colors pop and enhances photos, perfect for casual or family-friendly restaurants.
- Durable finishes: Laminated or coated menus resist wear and are easy to clean—ideal for busy restaurants.

Menu design templates in VistaCreate
Where to print restaurant menus
A professional printing service ensures your menu design looks just as good on paper as it does on screen. VistaPrint offers a range of menu printing options with customizable templates, paper stocks and finishes that match your brand. Working with a printer also means you’ll get precise color reproduction, durable materials and a polished finish that DIY printing can’t match.
Once you’ve checked your proof, you’re ready to print menus that look professional, feel high-quality and perfectly reflect your restaurant’s identity.
Ready to create a mouth-watering restaurant menu design?
The best restaurant menu design communicates quality. In a fine-dining restaurant, that means elegant and thoughtful design. In pubs or casual dining spots, it’s durable materials that survive spills and grab attention.
A great menu doesn’t just list dishes—it sells them. Smart layouts, strong branding and clear descriptions can turn curiosity into orders and boost your bottom line. The stakes are high, but even first-time restaurateurs can create a professional menu.